Viewing Responses

Once you have 
built a report, you will be able to view the responses via the iScout website.

NOTE: You must have permission (within the Roles & Permissions page) to view (a.k.a. analyze) responses.


Viewing Responses

To view responses:

  • Click the “Reports” menu button
  • Click “Responses” for the report you wish to view

Here you will see a page that allows you to filter the data, view responses, generate charts and graphs, and export the data to Excel or PDF.


Filtering The Data

At the top of the page, you will see various options for filtering your data by:

  • Submission Date
  • Observer
  • GPS Location
  • Pending Follow-Ups
  • Fields – These filters are automatically generated according to the questions you created within your form.

Select your search criteria, then press search to view the results:


Choosing A Visualization

Now that you’ve filtered your data, you can choose how you want to view it.

By default, you will see a listing of 
individual results. You can click on any one of the responses to view the complete response. To view something other than the individual responses, choose one of the visualizations:

These different visualizations are automatically generated from your questions within the form. For example, if you create a “Severity” question with “Low”, “Medium”, and “High”, then you will see a visualization for “Severity” with a bar chart and pie graph of those fields. Each visualization includes a “PDF” button where you can export it to PDF.


Exporting A Summary PDF

You can also generate a summary PDF of all the matched responses by pressing the down arrow next to the search button, then press “PDF”.

This summary PDF will show a summary of the data (including a trend and a map), plus the date, observer, and photos for each response. It is not possible to change the format or graphs within this report, but you can add additional columns. If you would like to include a field on the summary PDF, here are the steps:

  • Edit your report
  • Find the field you wish to include (e.g. Severity)
  • Click Edit > Advanced
  • Enter the title of the column for “PDF Column” (e.g. Severity)
  • Press Done > Save
  • Now the “Severity” will be listed on the PDF with a column title “Severity”

TIP: You can assign the same PDF Column name to multiple fields. So if you have 3 note fields within your form, you can set each “PDF Column” to “Notes” and all three fields will be included in one column.


Exporting A Spreadsheet

You can also export your search results to a CSV spreadsheet which you can open in Excel. Press the down arrow next to the “Search” button and choose CSV.

Location Accuracy (iOS / Android)

iScout will mark the GPS location of a device at the moment that a report is submitted.

The location is determined by the observer’s device. Accuracy is entirely dependent on their hardware.

Need help with location permissions on a device? See the Location Permissions Guide 

Typically a device will try the following strategies to get the best location possible (each being less accurate than the one before):

  • GPS – accurate within a few meters (assuming you have GPS reception)
  • WiFi – Typically accurate within few hundred meters, but can be off by very large amounts in rare cases
  • Cell Network – Uses triangulation of cell towers to estimate your position
  • ISP – Uses the geographic location of your Internet Service Provider. Can be dozens or even hundreds of miles off.
For the best results, make sure the observer’s device has GPS and permissions enabled.
For more information on enabling location permissions, see the 
Location Permissions page.

SCORM / AICC Files in a Lesson

When you build an online training in iScout, you can create many types of slides such as bullets, document, image, text, quiz, survey, and video. One of the slide types is a SCORM 1.2 or AICC 3.5 file which allows you to embed pre-existing training content within an iScout lesson.

For those not familiar, SCORM is an industry standard format for online training content.

Uploading Your SCORM File

A SCORM training is typically packaged as a “.zip” file. When you are building your lesson in iScout, add a new “SCORM” slide and then upload your “.zip” file. That’s it!

Compatibility

To determine whether your SCORM content is compatible with iScout, the best option is to upload the file and try it out.

In general, iScout is compatible with most SCORM files but compatibility cannot be guaranteed given the variance in implementations.

SCORM Quizzes – If your scorm content contains a quiz, iScout will generally be able to detect a pass/fail and in some cases can also capture the actual score. iScout cannot show analytics based on quiz questions within a SCORM (or AICC) file.

Usability

The biggest drawback to SCORM (and AICC) is that they typically perform poorly or not at all on mobile devices. For that reason we strongly recommend using the built-in iScout slides since they automatically reformat to look great on mobile and minimize bandwidth to reduce data usage.

Troubleshooting (iPhone / Android)

Having trouble logging in or using the KPA EHS app? Here are some troubleshooting tips.

TRY A DIFFERENT DEVICE

To make sure it’s not a device issue, try logging in from a computer on a different internet connection. If it works there’s something up with your device. If it doesn’t work, double check your username and password.

CHECK YOUR INTERNET

If you can login on other devices, open your phone’s web browser and go to https://www.kpaehs.com. Does it load? If not, something is up with your device’s internet connection or web filtering. Try a different connection or talk with your IT group.

CHECK YOUR NETWORK SETTINGS

If the browser works, but the app doesn’t – you may need to check your network settings. Wi-Fi and/or cellular connectivity may be disabled for the KPA EHS app. You can change this in the main Settings App on your device.

CHECK YOUR CLOCK

If your date or time is off, it may break your connection (due to security reasons). Try fixing your date/time.

Log Out And Back In

Try signing out of your KPA EHS account, then signed back in.

To sign out press the menu button at the top left of the iScout app. Then swipe the account you wish to logout of. Then press the red X. Now press “+” to sign in again.

Re-Install The App

It may also help to delete the app from your device and then reinstall it from the app store. Among other things, this ensures that you have the latest version of the app installed. Keep in mind that deleting the app will also remove any un-submitted reports and/or photo uploads.

  • Android – How To Delete An Android App
  • iPhone, iPad – press and hold the app icon on the home screen until it starts wiggling then press the X to delete it.

Check Memory & Storage

Verify that your device is not low on storage or memory.

Submitting Forms and Reports (Video)


The following is a transcript of the video guide:

This is going to be a walk through of what it’s like to submit a report on the iScout system.
I’m going to bounce over to the website and I’m already signed in.
If you have questions about signing in, or installing the app, or anything like that, check out the other video guides, they’ll walk you through the whole thing.
I’ve already done that in those guides so I don’t want to be redundant here.

Right now I’m in my iScout Homepage, I can go over to my Reports button.
Your page may look different, but you’ll probably have a Reports button over here, or if you scroll to the very bottom you’ll have the Reports that you can fill out.
I’m going to click on this Reports button and then for me, I have the option to do a lot of things, like viewing responses and editing things.
You may just have a Fill Out button right here and you may have other reports listed here.

It may not be a Near Miss Report or Observation report.
But whatever report you want to fill out, just click on the Fill Out button and then that’ll actually take you to the form.
For me I have, I’m an administrator in the system, so I have these two extra fields at the top that you may or may not have listed on yours, but what they are is these allow me to fill out a report on behalf of someone else.
If someone gives me a report with a piece of paper, or sends it to me over an email, or tells, you know, by word of mouth, I could actually attribute this report to them and say, “It wasn’t me, it was actually Bryan that brought this Near Miss to our attention.

It actually, you know, it’s going to default to today, but you could actually choose a day in the past and say it was actually a few days ago and you could set the date there as well.
If you don’t change any of those fields, then it’s going to default to Completed By Yourself and Completed Today.
Now I’m getting into the actual fields for the form that I’m filling out.
Yours will look very different, but in general you have these lists that you can select from and you click on them and it’s a dropdown list.

You may have a list of options like this and you click on it.
Some of the questions tha you answer may slide down other questions.
If I choose Working, it’s going to ask for the Working Subcategory.
If I choose Driving, it’ll show the Driving Subcategory and these’ll be different.

Be aware that the way that you answer a question may prompt more questions down below.
Then I may be able to choose multiple options.
For example, the body part affected may be head, and face, and eye, and neck, and throat so I can choose all of those options right there.
If I go down and try to submit the report without completing the whole thing, it’s going to actually show me the fields that are required, as well as this asterisk right there that’ll denote that it’s required.

I can actually go in and type in my text and then now that field is satisfied and it’s not red anymore, meaning it’s ready to be submitted.
Now I’ve filled out all the questions, but I have a field where I can attach photos right here on my phone, that would pull up my camera.
I could do a photo, or a video, or any other document.
But also, as I’m filling out this form I may want to clarify my answer by attaching a photo.

For the Action Taken for the Hazard, I may actually want to show them that there was an immediate change and I want to show them the fix right here.
I could hit this button that sits over on the right and it’ll show me an Attachments tab and I can click Add File and actually attach a photo, or multiple photos, or videos right there to show that action taken on this actual field.
The other thing that you can do is you could say, “You know, I’m not sure if I would call it Severe or High. ”
Or maybe I wasn’t there, “someone else had a better perspective.”

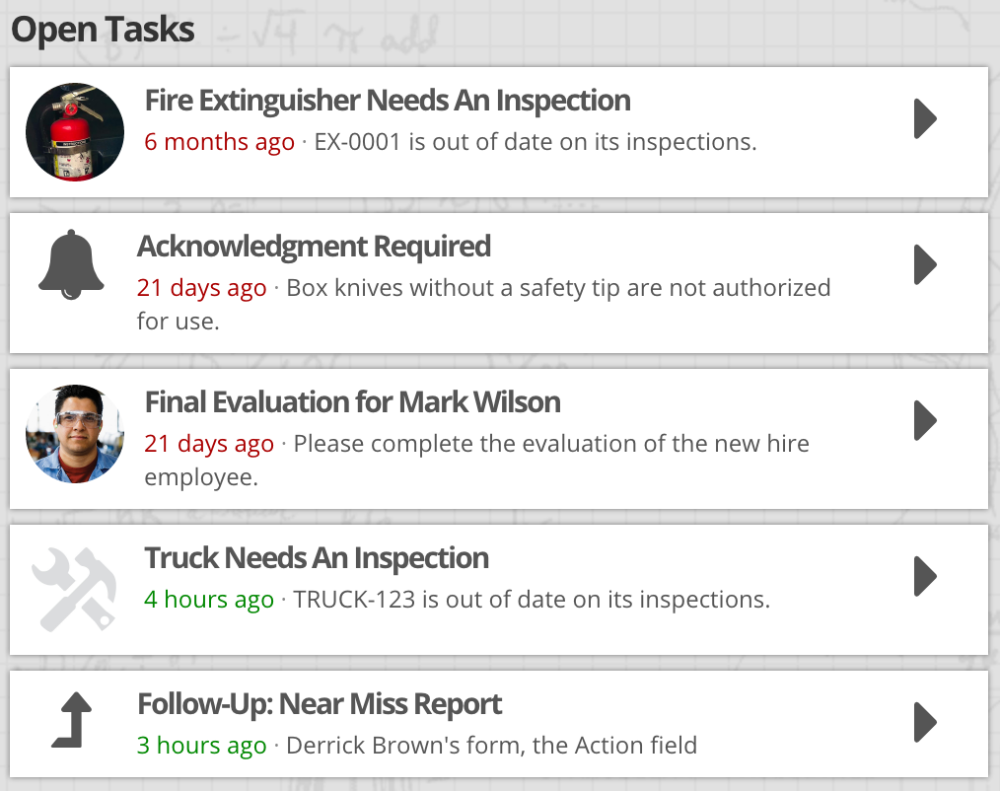
You could also with these, , bubbles that sit over here on the right, you could attach a Follow Up to this actual question and you could say, “I’m going to defer this to Derrick Brown,” and I’m going to say, “Derrick, please confirm”.
I will assign a Follow Up to him and now there’s an assigned Follow Up to Derrick Brown that’s unresolved.
I close it.
You can see that it’s sitting right there ’cause it’s highlighted and whenever I hit save it’ll actually notify Derrick Brown, create a task on his task list, and this report will have a unresolved Follow Up until he actually goes in and says, “”Yes, this information is correct.”

Or maybe he’s going to actually fix the issue or whatever he needs to do for that Follow Up.
That’s what it looks like to fill out a form.
We have other controls where you may draw a sketch and you would just click on the button to draw it and you could just click and draw on the canvas.
Then we have Date Pickers and Time Pickers if you’re choosing a date or a time.

But they’re all pretty straightforward, you just click on it and just walk your way down the form.
There’s a little bubble on the left as well that may show you extra information.
If someone wants to add a description of what information they’re looking for right there you might mouse over that and get a little bit more information.
I’m going to go ahead and submit this report.

Now it’s done, it’s saved to the server, and I can go back to my Homepage or I can complete another, if I needed to complete another Near Miss Report real quickly.
That’s a pretty good overview of what it looks like to fill out a report.
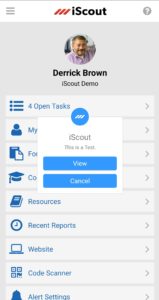
For the app side of things, I was going to show you what it looks like to use, to submit a report via the iPhone app, so I will pull that up right here.
Now I have the iScout iPhone app and I’ve already signed in and downloaded, and all that.

If you don’t know how to do that check out the iPhone app video guide or Android app video guide.
But yeah, I have this Reports button sitting right in the middle of my page here and I can click that and in the same way I can submit those same reports.
Even if I don’t have an internet connection I can click on Observation Report, I can fill the whole thing out, I could hit save, or submit and it’ll actually save it to my device until I regain an internet connection later.
Then down in Pending Reports, if I have any that I have not been uploaded to this site because I didn’t have any internet connection, I can go there and it’ll show me what’s still sitting on my phone waiting to be uploaded.

That’s a quick look at what it looks like to fill out a report.
If you have more questions on other pieces of the website, definitely check out the video guide section.

Open Task List

The Open Task list includes many different types of tasks in one simple list:

  • Training – a task is created when an employee’s training is incomplete or out of date
  • Equipment Inspection – shows up when equipment is assigned to an employee and the equipment is out of date on an inspection
  • Acknowledgment – alerts sent by your organization automatically create an open task and show up until they are “acknowledged”
  • Mentor Training – if an employee has training that is out of date, it will create an acknowledgment task for their mentor which can be dismissed
  • Follow-Ups – any time a follow-up is assigned to an employee then it will show as a task until it is resolved or forwarded
  • New-Hire Evaluations – If your company uses the “new hire evaluations” to do periodic reviews of new employees, then tasks are automatically generated for mentors, supervisors, and HS&E’s
  • System Tasks – There are various other “iScout System Tasks” which may be assigned such as “Getting the Site Setup”, etc.

Manually Assigned Tasks

It is important to understand that almost all tasks are generated automatically.

However, it is now possible to create scheduled tasks for groups of employees, an individual employee, or yourself, to complete an assignment through an Open Task, and track the completion of those tasks.  Click here for more information about Scheduled Tasks.

Task Notifications

Some tasks (such as follow-ups and acknowledgments) will notify employees via the iScout app or possibly by email. Other tasks (such as expired training or incomplete inspections) do not create alerts, but simply show up in the open task list.

Continue reading “Open Task List”

Location Permissions (iPhone / Android)

When you begin filling out your first report, the device may ask you for permission to access your location.  Press “Allow” to grant permission.

If you accidentally denied permission and would like to allow it, follow these steps.

Android

iPhone and iPad

  1. Open the Settings app
  2. Open Privacy > Location Services
  3. Make sure Location Services is set to “On” (green)
  4. Now scroll down and select “iScout”
  5. Choose “While Using the App”

Web Browsers