Notification Settings (Video)
The following is a transcript of the video guide:
This is a video guide to walk through the notifications for the iScout application.
I’m going to go to the iScout homepage, or my iScout homepage, and at the top right, you can see a messages icon, and it shows that I have no unread messages from iScout.
Then I can also view my employee profile right here.
I’m going to show you there’s a couple of different ways to get to your alert settings.
First I’ll go to my employee profile, and on the right I can see there’s an edit notification settings icon right there.
I could click that, and that’ll take me to edit my notification settings.
Also, the other way to get there is there’s this messages icon that I was showing you.
You can actually click on that, and that takes you to a listing of messages that have been sent to you in the past for iScout.
You could click on one to view it.
Then you could go back to that page where you have the messages listed, and on the very right there’s another edit notification settings button.
That’ll also take you to edit your settings.
The first thing before I get into that, I want to show you on your profile, first of all, you have your email address assigned to your account.
When emails are sent to you, they’re sent to that address.
But then also, if you’ve signed in through the iPhone, iPad, or Android app and you scroll down on your employee profile, you’ll see these two areas where it shows your iPhone alerts status and your Android alerts status.
I haven’t installed the Android app on my device, so there are no devices associated right there, but I have signed in on my iPhone.
I can actually see that my iPhone is connected right now to my web profile.
If I wanted to, I could actually disable that and say no I don’t want the website to send me notifications on my iPhone, or I could actually click Test, and if I do that, it actually will send me a notification right away on my iPhone just to test and make sure that that’s working right.
If you have multiple devices associated, like an iPhone and an iPad, you could control which ones are receiving the alerts right here.
That’s how you associate your iPhone, or your Android, or your email address with these notifications.
I’ll go back up here to our notification settings button and I’ll show you what site wide notifications we have built in.
If you have admin access, then you’ll see most or all of these options right here.
If you have employee access or manager level, you may or may not see some of these notifications, and more of them will be coming as the site develops.
By default, when an acknowledgment is sent out to you, it’s automatically going to send you a notification on your iPhone, iPad, Android mobile devices, but you can also opt in and say I’d like to receive an email as well.
If you do that, then you’ll get an email whenever those are sent out.
We also have a weekly listing of upcoming employee anniversaries.
You could get those via email, or iPhone, or Android.
When a new hire graduates from the on-boarding process, you could get alerts for those things under the email, iPhone, or Android.
Again, that’s if you have access to view new hire evaluations and graduation information.
Normally, that would just be an admin role.
If someone assigns a follow-up to you, so they’re filling out a report and they say there’s an issue here, it needs to be resolved by you, then you could opt in and say I’d like to receive an alert on my iPhone, and then now if you have it set up that way, it’s going to ping you on your iPhone, you can swipe it, and you can actually reply and mark that follow-up resolved right there.
Then we have a whole other listing of notifications depending on the reports that you have in the system.
We’re going to go into that more on a different help guide, but just to show you a quick view of what that looks like, it’s going to list out all of the reports that you have access to view, and then basically you can set up different types of alerts depending on the reports coming in.
You could say, you know, I want all responses emailed to me, or I want it to ping me on my iPhone whenever the quality rating is poor for this audit form.
That’s a quick look at what it looks like to edit your notification settings for iScout.
If you’re an admin, you can also view another employee’s profile, which I’ll do right here.
Then you may also have access to edit their notification settings.
Here I can click on Edit right here for Mark Wilson, and I can actually go and edit his settings on behalf of him.
I can make sure that follow-ups are being sent to his email, or his phone, or acknowledgments, and those things.
That’s it.
That’s a quick look at notifications.
If you want to know more about the report notifications, go to that video help guide.
What’s New – Resource Tags / Training Completion Signatures
Manage Resources with Tags
Starting Monday, August 26, the Resource section of iScout will be managed using Tags instead of Categories. This will make it easier to manage and access documents posted in Resources. Please check out the video to learn more this new feature.
Require A Signature For Training Completions
Now you can require users to include a signature when they complete a training. You can back date the requirement to get signatures for previous completions, or enable it moving forward from a specified date. 2020Training users will be prompted to sign off after lesson quizzes.
What’s New – Equipment Inspections / Search Feature
Inspection Scheduling
Scheduling equipment inspections is easier than ever with rolling, weekly, and monthly schedule options.
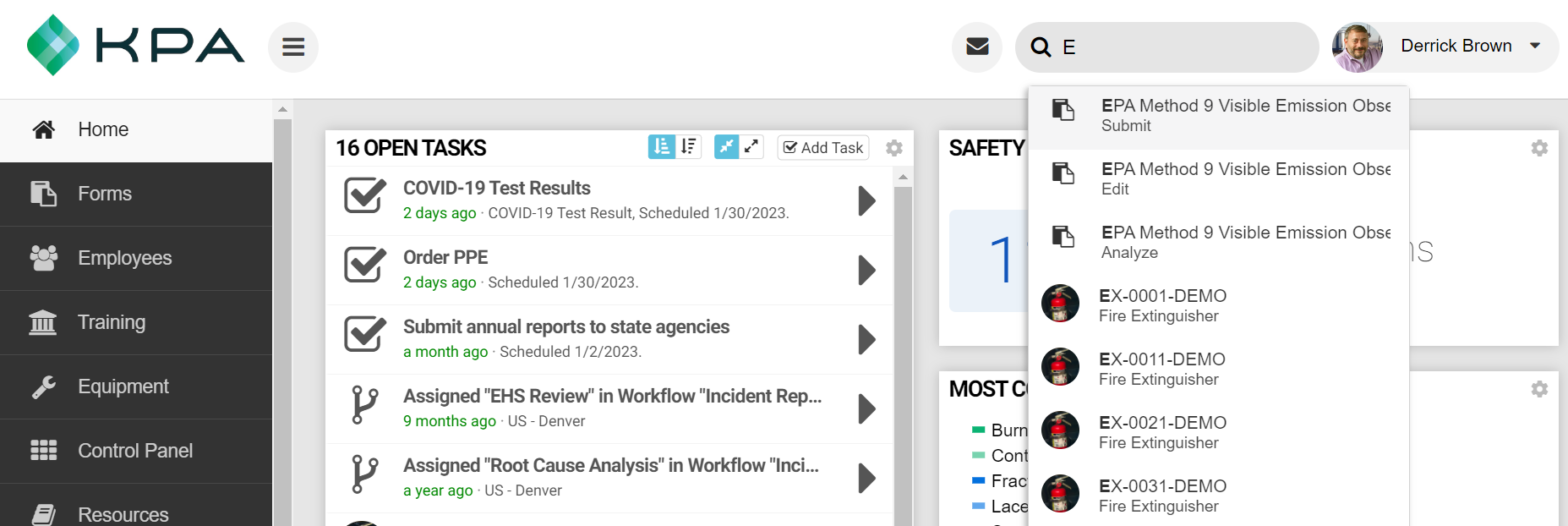
Updated Search Bar
Now you can use the Search Bar to find items throughout your iScout site, including employee profiles, equipment, forms, training, and more.
How Follow-Ups Works
Overview
By default, each question within a iScout report allows the observer to assign a “follow-up”.
When a follow-up is assigned, it notifies the person and creates an open task for them. They are then able to close-out a follow-up or re-assign it.
Assigning A Follow-Up
When filling out a report, you will see a circular button (called the “More” button) on the right side of each field.
NOTE: The “More” button can be hidden on each field when building the report. Open the advanced settings on the field and check “Hide more button”.
- Press the “More” button
- Click to show the “Follow Ups” tab
- Assign the follow-up to another employee
- Enter notes that instruct this employee with how to complete the task
- Press “Assign” then “Close”
- Once the response is submitted, the follow-up(s) will be created automatically
Addressing A Follow-Up
Once a follow-up is created, it will automatically notify the employee (who it is assigned to) according to their notification settings (My Profile > Notification Settings).

To address a follow-up, the employee should click on the open-task. This brings them to a screen where they can resolve the follow-up. On this screen, you will see:
- A link to the original response
- The name of the observer
- The date of the report
- The message from the observer
The follow-up can either be marked resolved or it can be re-assigned (forwarded) to another employee. There are fields for notes and attachments as well.
Finding Unresolved Follow-Ups
When viewing responses, it is possible to filter the data to only show un-resolved responses. Choose “Pending Follow-Ups” under the “Follow Ups” filter:
Message / Notification Settings
NOTE: This article discusses notification settings within the iScout website. For assistance with the iPhone or Android apps, please see the Managing Alert Settings (iPhone & Android) article.
Message History
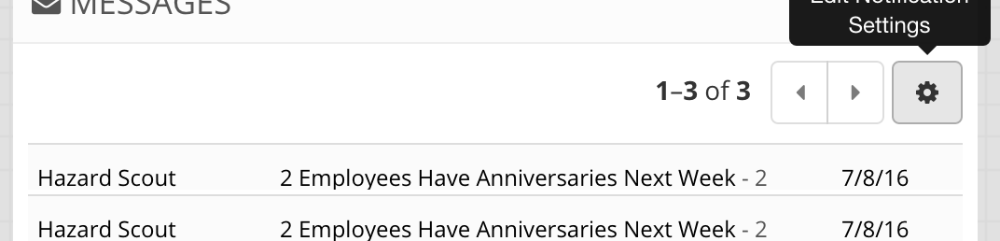
You can review messages that have been sent to you in the last 30 days by clicking the mail icon at the top of the iScout website.
Once you click on a message, you can see:
- When it was sent
- What the message was
- Where it was sent
- The subject
Finding the Notification Settings Page
Click the settings icon on the “Messages” page to edit your message settings.
You can also press the notification icon within the “My Profile” page to edit your settings.
NOTE: If you have been given the “Edit Message Settings” permission then you can edit the message settings for another account. Simply open the person’s profile and click the notification settings icon (it looks like a bell).
Changing Your Notification Settings
Now that you’ve found the “Notification Settings” page, you can subscribe to any of the notifications. For example:
- Acknowledgments – These are alerts sent by your company that require an acknowledgment. These alerts are always sent to iPhone or Android devices (it is not possible to turn them off). Additionally, you can receive email alerts as well.
- Employee Anniversaries – Receive a notification each Friday morning including employee anniversaries for the following week. The employee “Hire Date” is used for this calculation. You must have permission within the Control Panel to receive these alerts.
- New-Hire Graduation – Receive a notification when a short-service employee is graduated through the new-hire evaluation program. As always, you must have permission to receive these alerts.
- Assigned Follow-Up – Receive a notification when a followup is assigned to you when a form is filled out.
- Reports – This link takes you to a separate page where you can subscribe to incoming responses. Learn More About Report Notifications
What’s New – Benzene Awareness Lesson and ISN Numbers
2020 Training – Benzene Awareness
Benzene is a hazardous chemical compound that can be present in several working environments. This lesson explores the definitions, health hazards, management strategies, and protection practices to keep employees safe when working around benzene.
Employee ISN Numbers
Add ISN Numbers To Employee Profiles
Now you can add an employee’s ISN number in their user profile and they can access it online or in the app.
Rolling vs Window Training Schedules
There are two ways to schedule training in iScout –
Rolling and Window.
Rolling
If you are a long-time iScout user, this is the “original” way.
With a “Rolling” schedule, a training will expire exactly one year (or month, etc) after the training was completed. You can set the renewal period to 1 year, 2 years, 6 months, etc.
For example, John’s group is assigned “Ladder Safety” on June 1st, 2019. On June 10th he completes the training. “Ladder Safety” will now be due (for John) on June 10th, 2020.
Window
“Window” schedule trainings allow you to setup a window of time each year that a training is completed. This is for annual trainings only. Employees are considered up-to-date if they completed it last time the training was offered.
For example, I want everyone to complete “Ladder Safety” in June each year, regardless of when they previously completed it.
Learn More:
Window-based Training Schedules
Window-based Training Schedules
Managing Alert Settings (iPhone / Android)
To receive iScout alerts, you need to complete two steps:
- Give Permission
- Enable Alerts
Step 1) Giving Permission
When you first install the iScout app, it will ask permission to send you notifications. Press “Allow” to enable alerts.
If you don’t “Allow” notifications, you can enable them later within your device settings.
Android
- Click or tap Apps > Settings > MORE.
- Click or tap Application manager > DOWNLOADED.
- Click or tap your Arlo app .
- Click or tap Show notifications to enable or disable push notifications.
iPhone, iPad
- Open the “Settings” App
- Choose “Notification” > “iScout”
- Enable “Allow Notifications” and all other settings
- You may also want to change the alert style to “Alerts” so that it isn’t automatically hidden
Step 2) Enabling Alerts
Now that permission has been granted, you’ll need to enable alerts for your account.
- Open the iScout App
- Click “Alert Settings”
- If alerts are disabled, press “Send Alerts Here”
Testing Your Notifications
Now your alerts are enabled. You can verify this by opening your employee profile from the website.
- Login to your iScout site in your web browser
- Open your “Employee Profile”
- Scroll down to the iPhone or Android section
- Press “Test” next to your device
- This will immediately send you a test notification
The Search Bar (Video)
Check out this quick video below to learn more about the Search Bar.