One-Off Trainings (Video)
OSHA Case Management (Video)

OSHA CASE MANAGEMENT
The OSHA Case Management module is used to track recordable work-related injuries and illnesses, generate OSHA forms 300, 300A, 301, and to analyze stats like TRIR and DART.
To learn more about OHSA recordkeeping, click here.
SETTING UP CASE MANAGEMENT
NOTE: To edit and access this module, you must have the OSHA Case Management permission granted to you.

Navigate to Control Panel > OSHA Case Management
Here, you will see a message to Enable the module and get started.
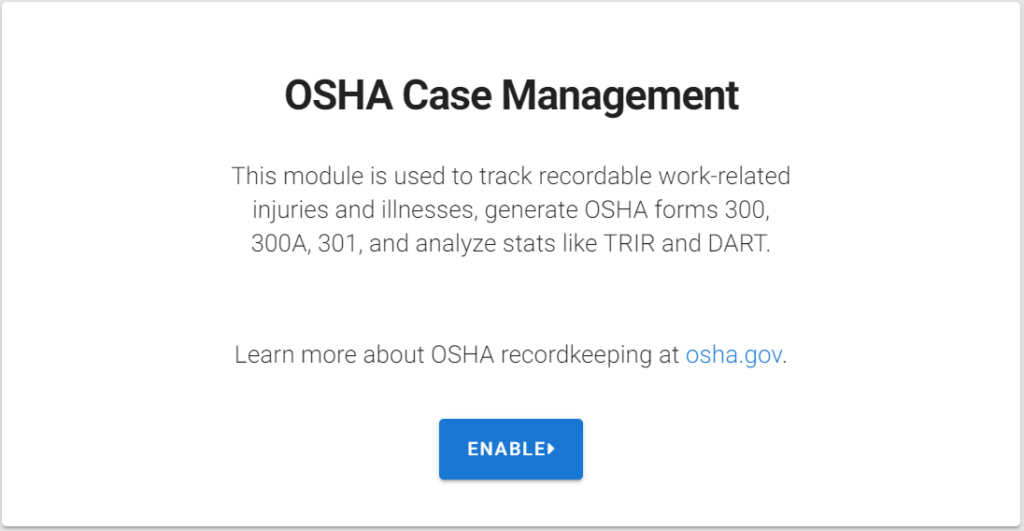
Once you click Enable, the site will walk you through the steps of adding data to your module.
CREATING ESTABLISHMENTS
An OSHA establishment is a single physical location where business is conducted or where services or industrial operations are performed. Learn more about OSHA’s definition of Establishments here.
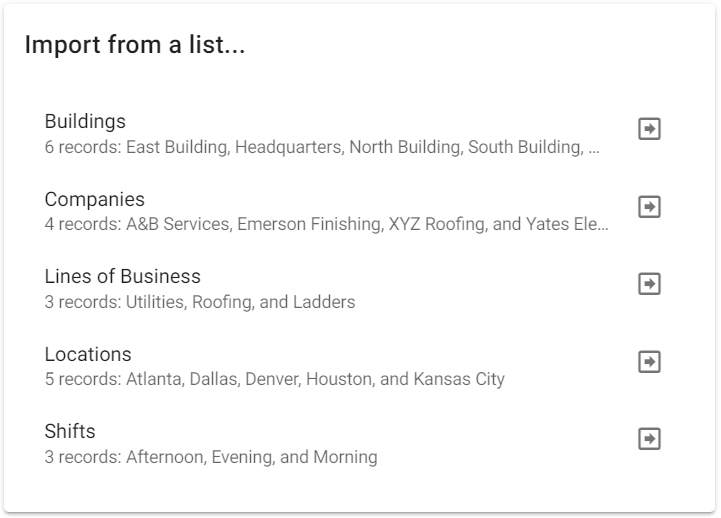
You can create Establishments 2 different ways, from a List or Manually.
Import from a list…
This allows you to import from pre-existing lists in your iScout account, like Companies, Lines of Business, Locations, or other Datalists.
Create Manually…
You can create new Establishments manually by entering all required information.
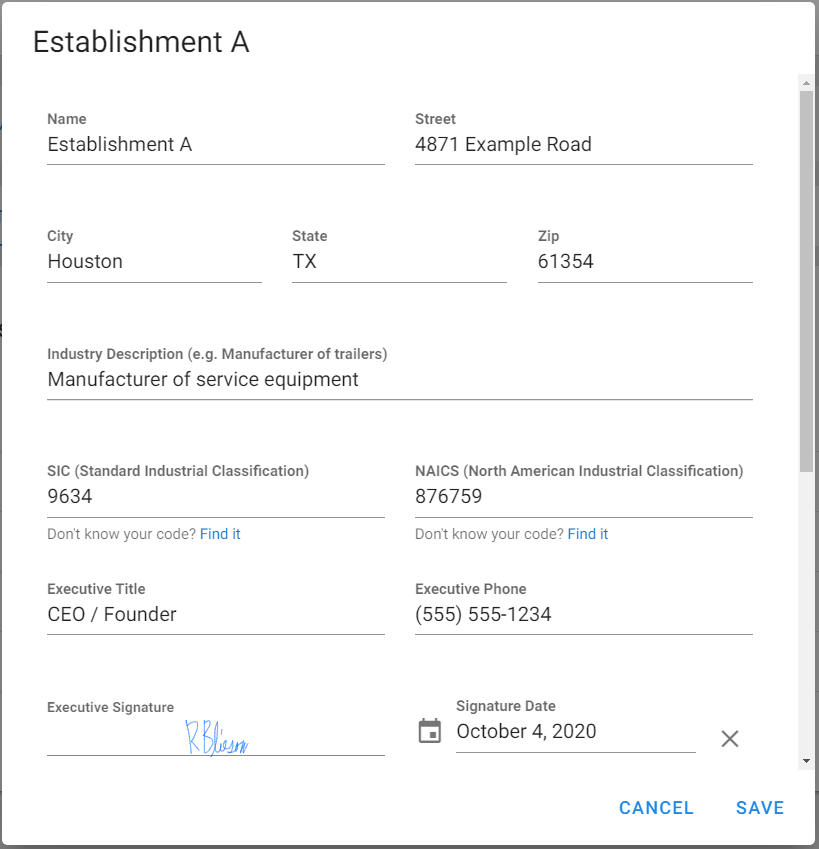
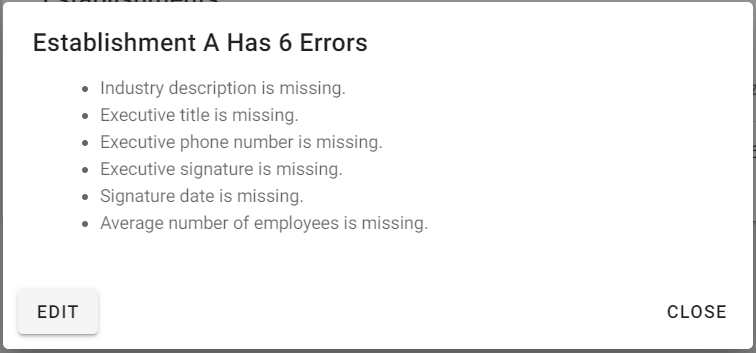
Whether you create an Establishment from a List or Manually, there are certain pieces of information that are required.
- Establishment Name and Street Address
- Industry Description
- SIC (Standard Industrial Classification)
- Click the Find It link to search the OSHA site
- NAICS (North American Industrial Classification)
- Click the Find It link to search the NAICS site
- Executive Title and Executive Phone
- Executive Signature and Date
- Average # of Employees working in that Establishment per Year
If any of this information is missing, an error message will appear, listing the missing data and giving the option to make edits.
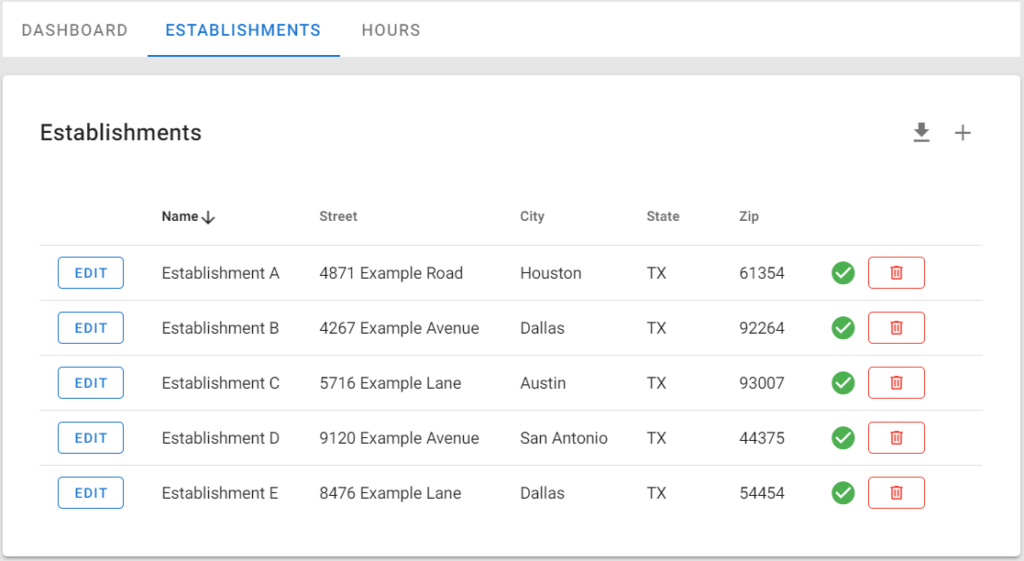
Once all Establishments are entered, you’ll see them listed here. They can be Edited, Deleted, downloaded into an Excel file, and new Establishments added. This will also indicate that all required fields are complete with the green check mark.
ADDING EMPLOYEE HOURS
In order for iScout to calculate safety related metrics of TRIR (Total Recordable Incident Rate) and DART (Days Away, Restricted or Transferred), Employee Hours need to be recorded.
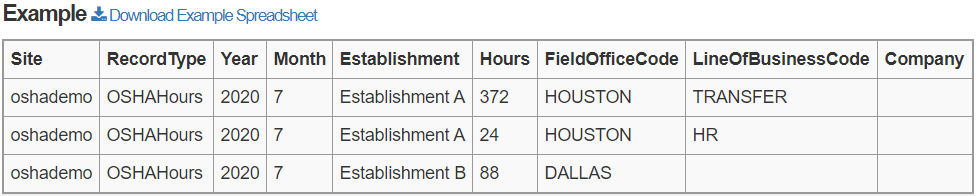
You can add Employee Hours 2 different ways, from a Spreadsheet or Manually.
To add hours using a Spreadsheet, click the link to load a bunch of hours.
To add hours Manually, click +ADD HOURS next to each month.
- Select the Establishment
- Add total Employee Hours
- Select the Field Office, Line of Business and Client (if necessary)
- Click the + button to add additional hours for the month
- Click the

button to Clone the hours to a different month
- This can be useful if your hours history is consistent each month
- Click the
 button to clear all hours from the month
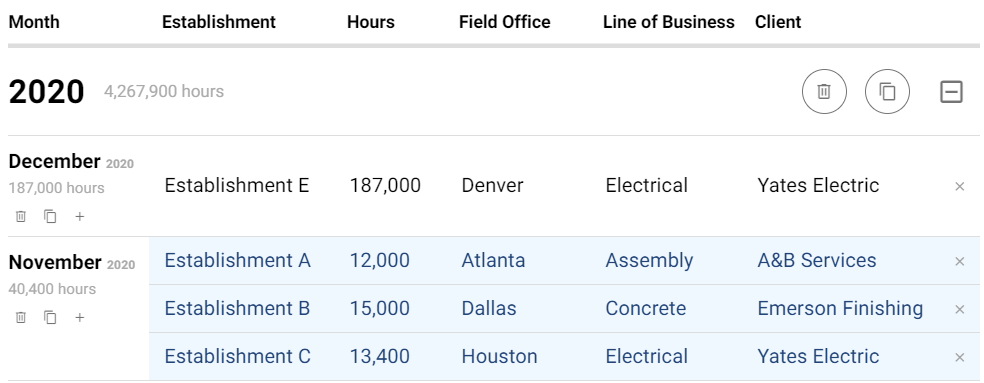
Click Save Changes to update hours. These can always be edited in the future.
DASHBOARD
Once Establishments have been created and Hours have been added, the Dashboard will give you visibility to your Incident History and Statistics.

ADDING A NEW INCIDENT CASE
To begin a new incident report, click + NEW CASE on the Dashboard page to begin filling out the OSHA Recordable Incident form.
This form will only be available to fill out within the OSHA Case Management module. The data that is collected in this form is used to calculate TRIR, DART and Severity metrics.

The form is created to capture all required information to satisfy the OSHA Form 301 report, including the Outcome of the case.
In Outcome, if Days Away From Work or Job Transfer or Restriction are selected, choose how you want to keep track of those days, Calculated or Manual.
- Calculated will allow you to create distinct periods the employee was away from work, select the date the period started, and iScout will automatically calculate Days Away in real time.
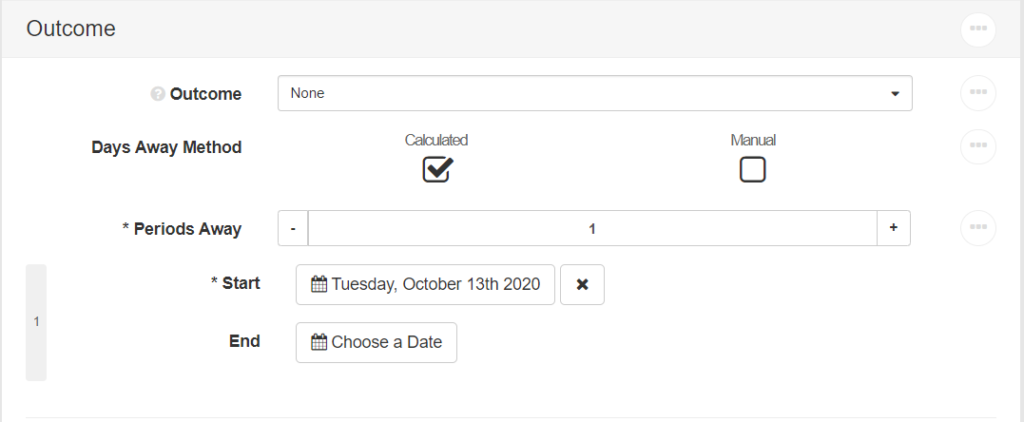
- Manual allows you to manually update the number of days the employee has been away from regular work.
Once all available information has been filled out, click Submit to enter the form and create a new case.
For more information about How to Administer the OSHA Case Management module, click here.
Audit Logs (Video)
Workflows (Video)

Forms to Training Mapping (Video)
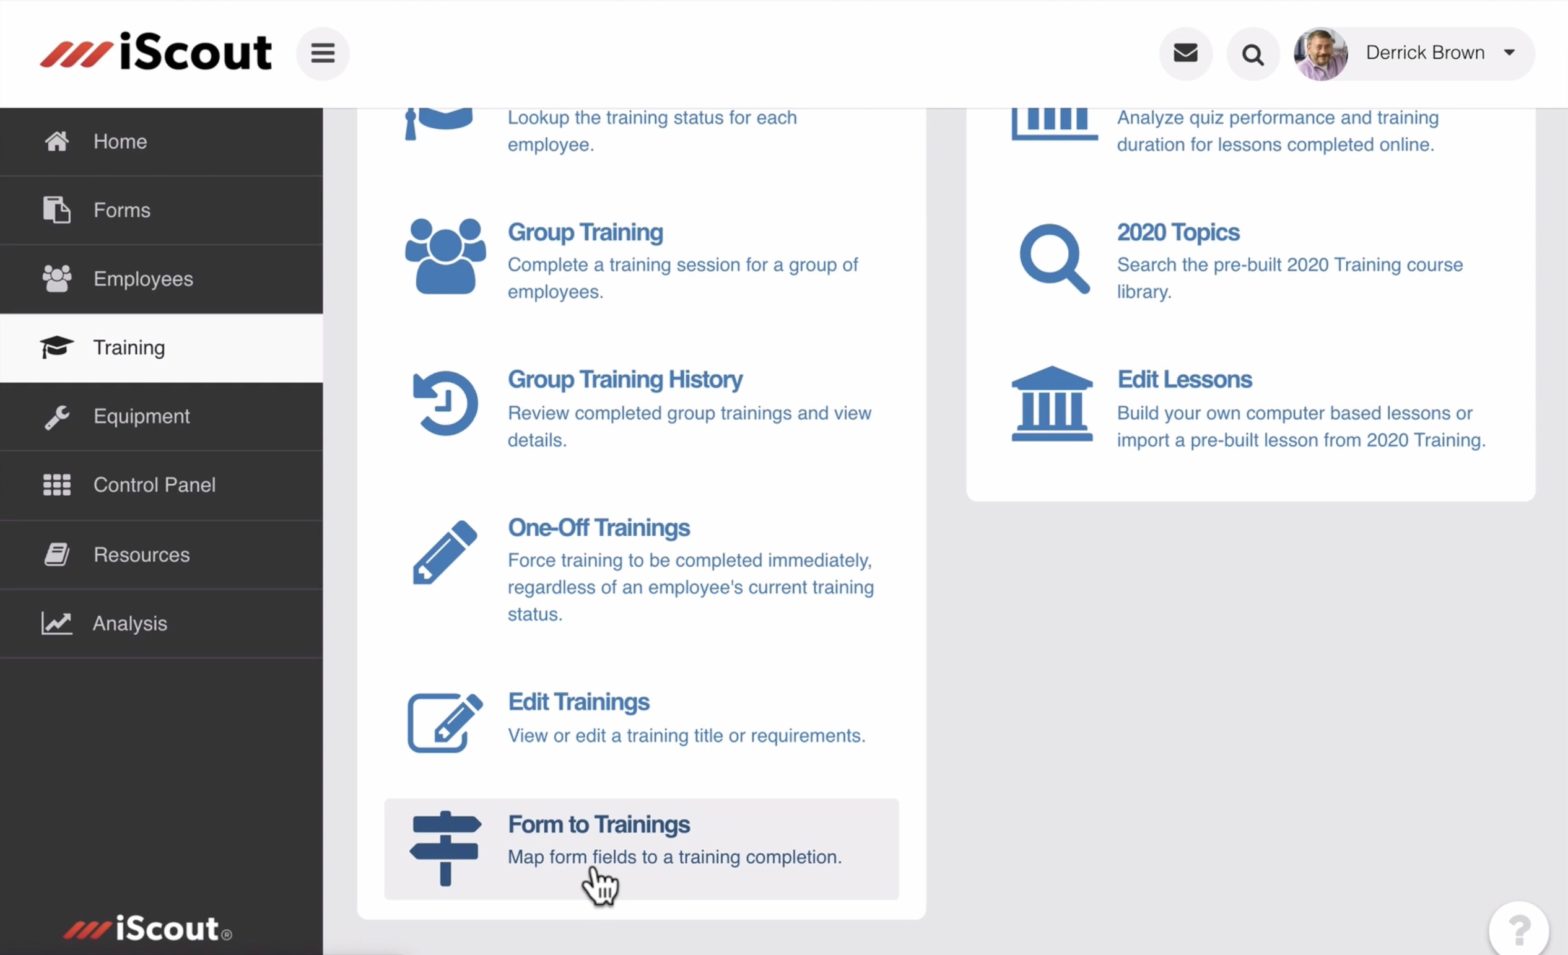
There are many ways to mark a training complete in KPA EHS such as taking a lesson, uploading a spreadsheet, group trainings, and more. In some cases, you may want a form response to mark a training complete.
For example, say you have a “Forklift Operator Evaluation” that is done by a supervisor. The supervisor fills out an iScout form as he/she does the evaluation. If the student passes, you want to automatically mark their “Forklift Evaluation” training complete. To do this, you’d need to setup a “Forms to Training” mapping. Watch the video below for a full walk-through.
Supervisor, Manager, HSE, and Mentor on Employee Profiles (Video)
Adding Videos in the Lesson Designer (Video)
If you wish to upload your own content to be used in lessons, please note that your video needs to be in MV, MP, MOV, WMV, AVI, FLV, WEBM, GPP, or MPEG format with a 200MB limit. To check this from a PC, right click on the video and select “Properties”.
To add a video from the Lesson Designer, select “+Add Slide” and choose “Video”:
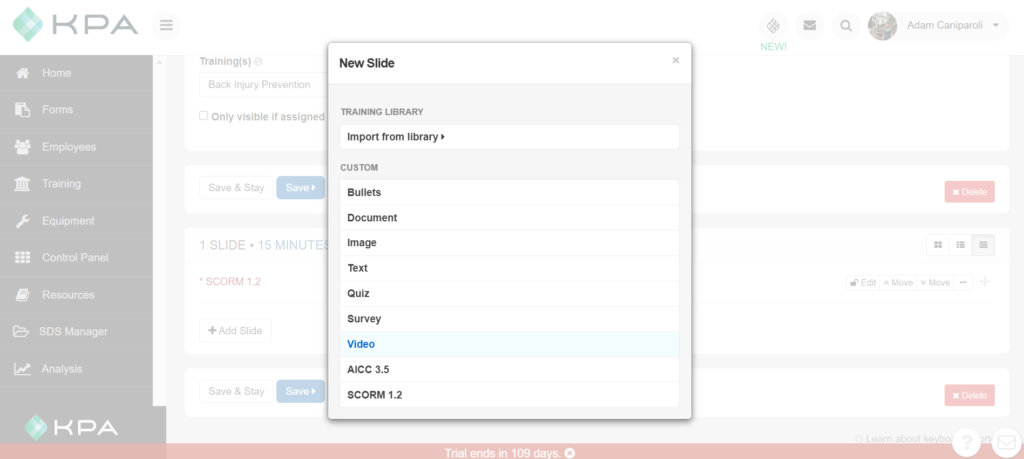
From here, you can choose to either add a link from YouTube or Vimeo, or you may upload your own video directly from your computer. Choose “Upload” to add a file directly from your computer:
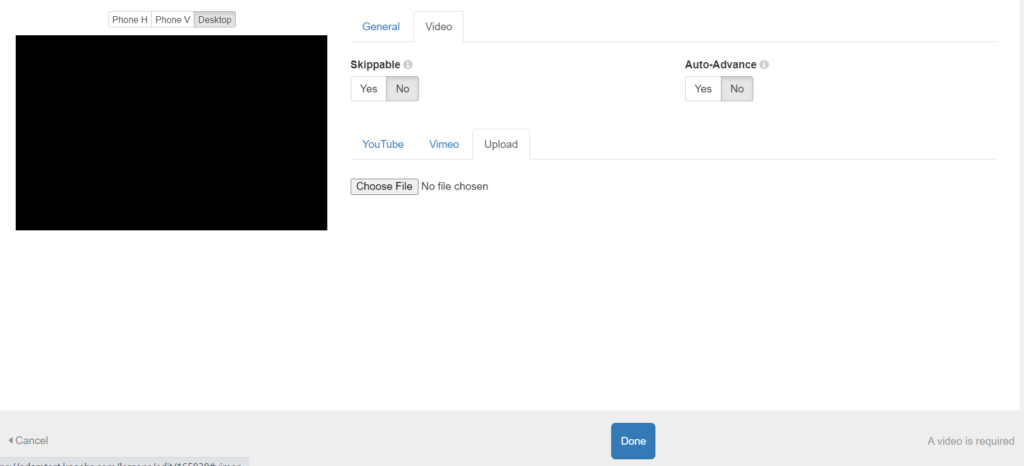
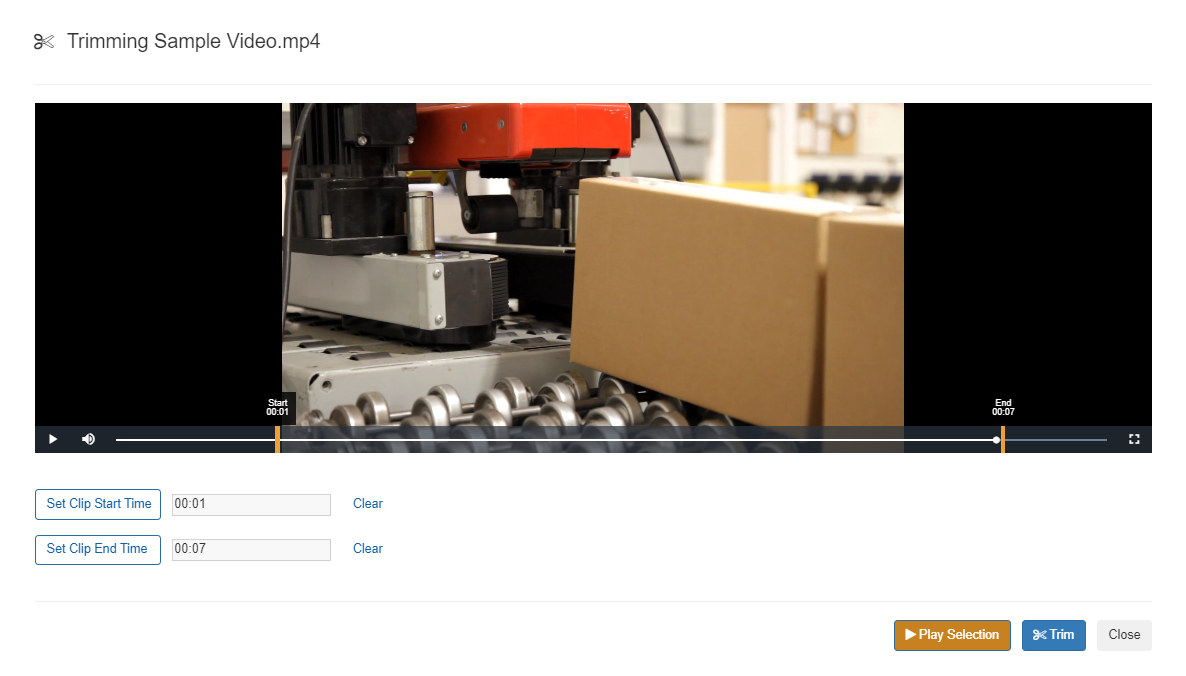
Select “Done”, if you don’t need to make any changes. If you wish to shorten or trim your video, select “Trim Video”.

From here, you can drag the progress bar to any given point, and select “Set Clip Start Time” to set a new starting point. Now drag the progress bar again to where you wish to end the video, and select “Set Clip End Time”. You can select “Play Selection”, to review your edits, and when you’re satisfied, select “Trim” to save your changes and re-process the video.

Close this window to return to the previous screen. Select “Done”, to return back to the Lesson Designer page.
To see this all in-action, please refer to the video below. Thank you!
Getting Started with SFTP
Are you looking to get started automating your dataloads in KPA EHS via SFTP?
We recommend you get in contact with a member of your internal IT Staff.
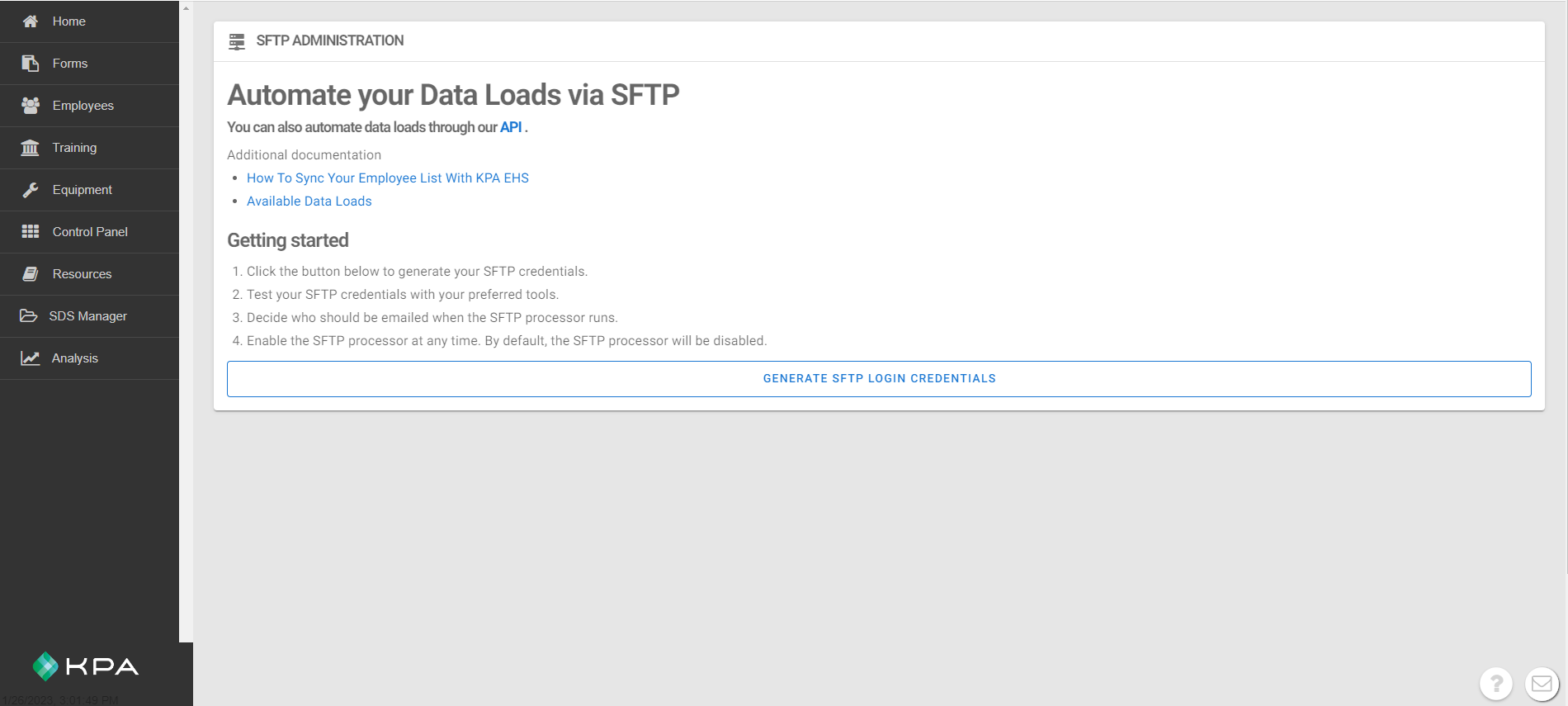
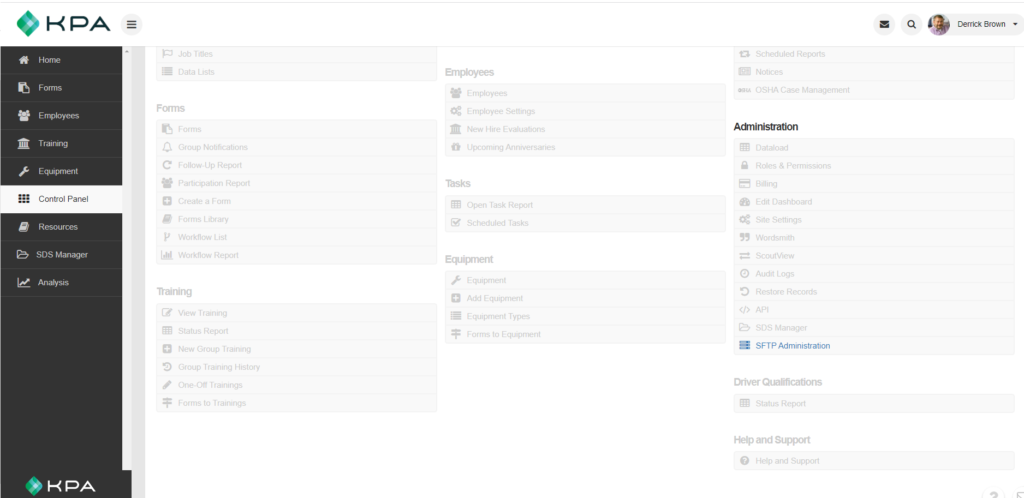
Then, go to the Control Panel, and look for the SFTP Administration link in the Administration section:
The first time anyone visits this page you’ll see a landing page that allows the user to generate the SFTP login credentials. Read through everything on this page and then click “Generate SFTP Login Credentials”:

This next page should give you all of the credentials you need to set up the SFTP connection. The blue section at the top contains the credentials you’ll need.
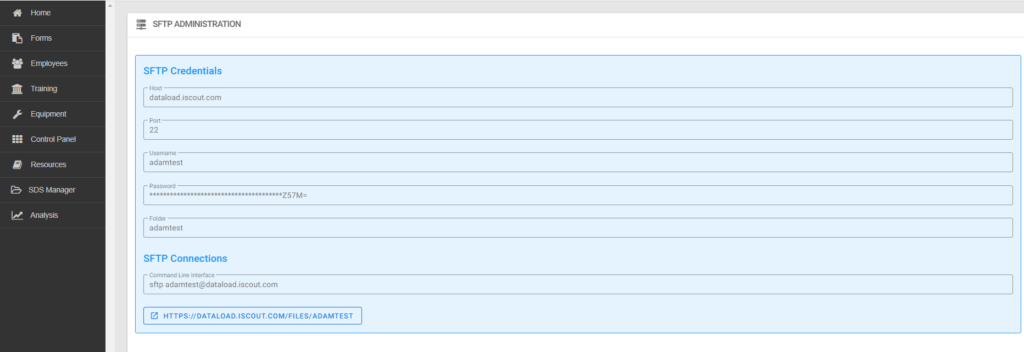
The pink section in the middle contains supporting documentation. The white section at the bottom contains the fields to setup email notifications when the SFTP processor runs.
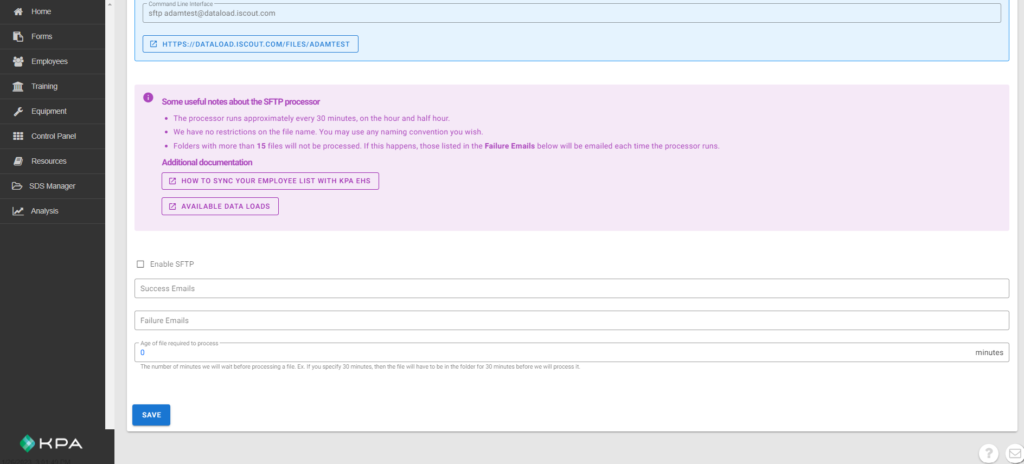
Don’t forget to select the “Enable SFTP” checkbox and save the page once everything is ready.
Please watch the video below for additional information, and please don’t hesitate to reach out to [email protected] for additional assistance.