KPA EHS supports Single Sign-On (SSO) for authentication via a number of identity providers: Microsoft, Google, Okta, Azure AD, OAuth, and SAML. If you are interested in activating this feature, please reach out to [email protected] to discuss pricing and options.
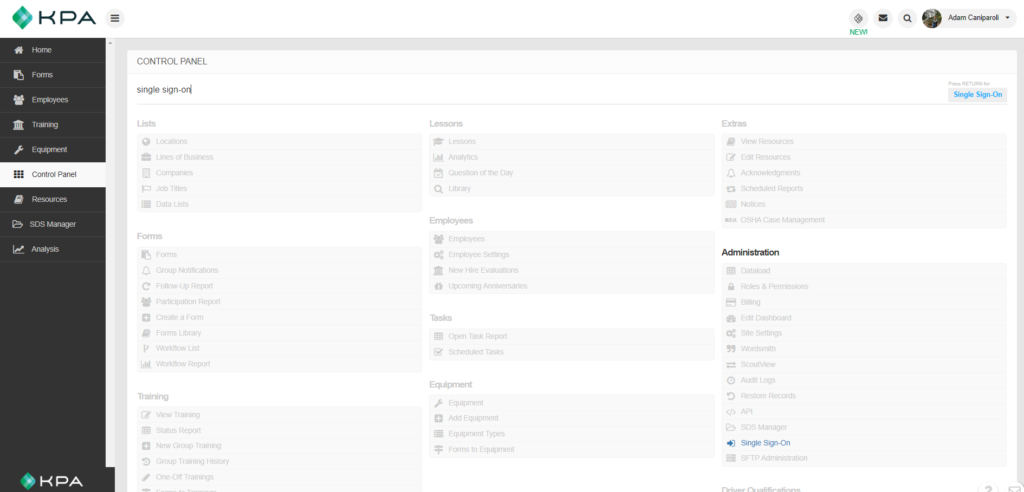
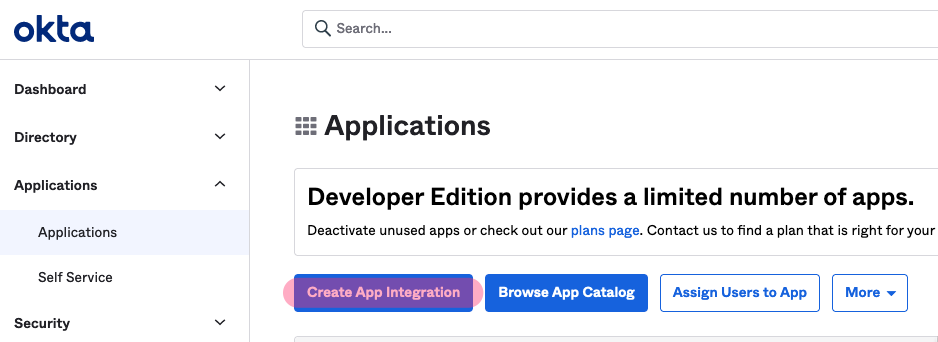
Please note that setting up SSO access requires some technical knowledge, and you will likely need the assistance of someone from your internal IT department to get started. Once enabled, you can find the link for SSO admin in the control panel under the Administration section:
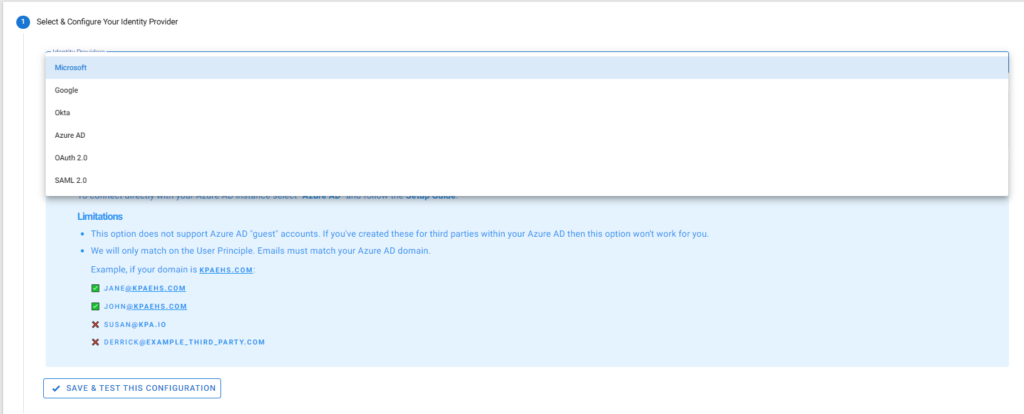
Please note that at this time, you can only use SSO to manage authentication, not to provision profiles. 1. Scroll down and select an identity provider from the drop down list:
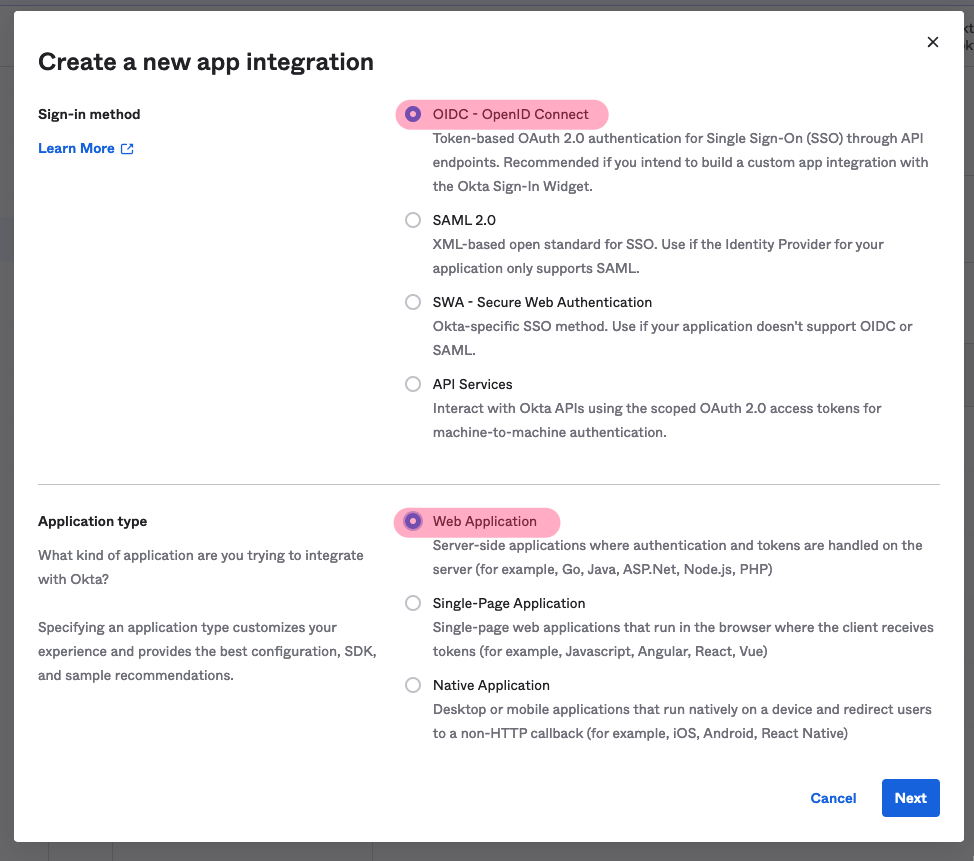
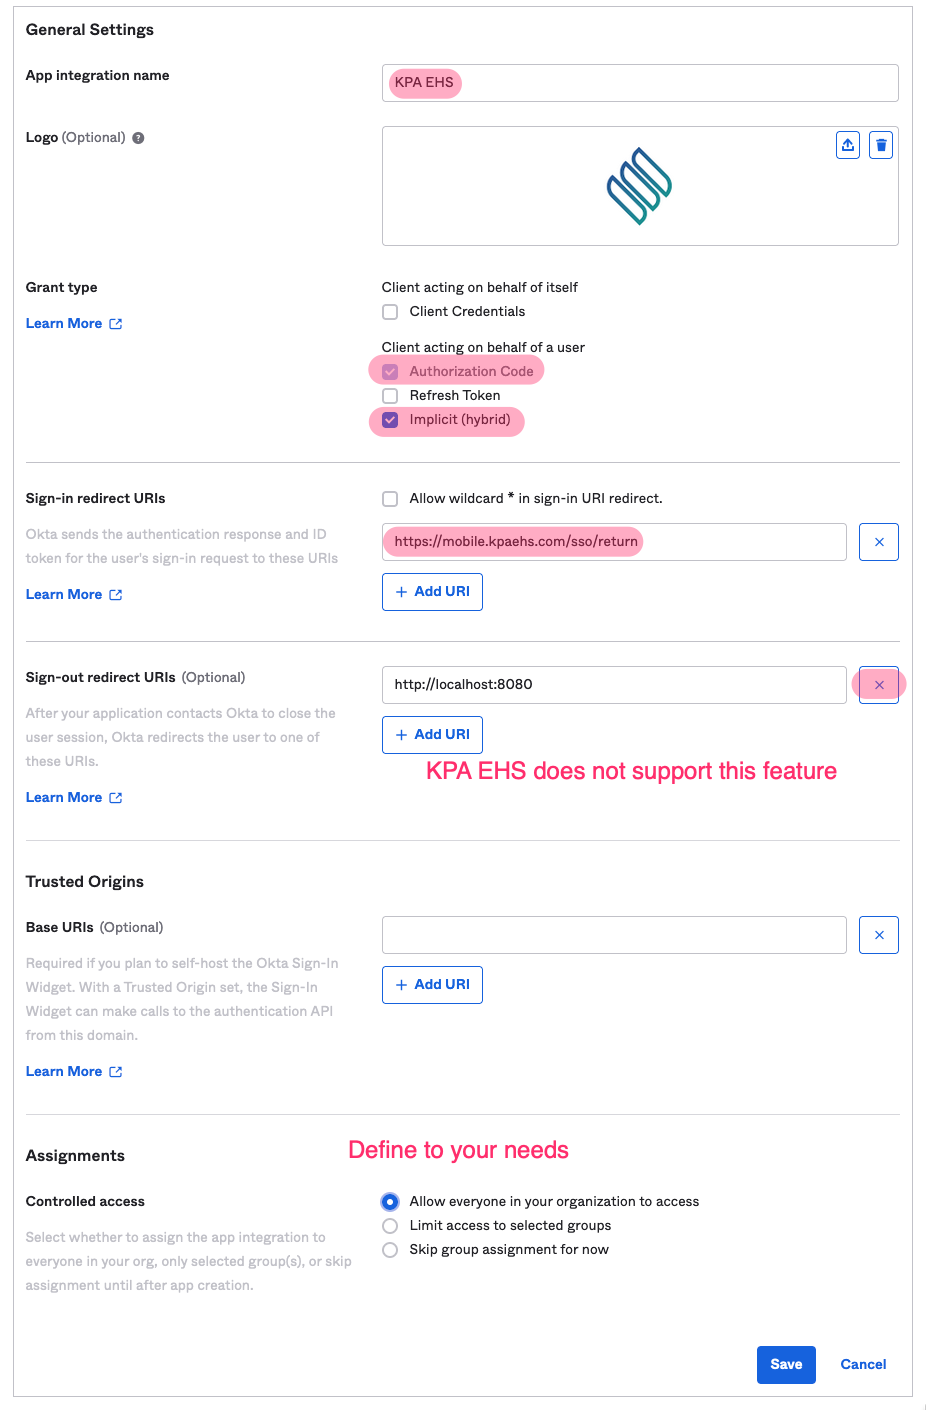
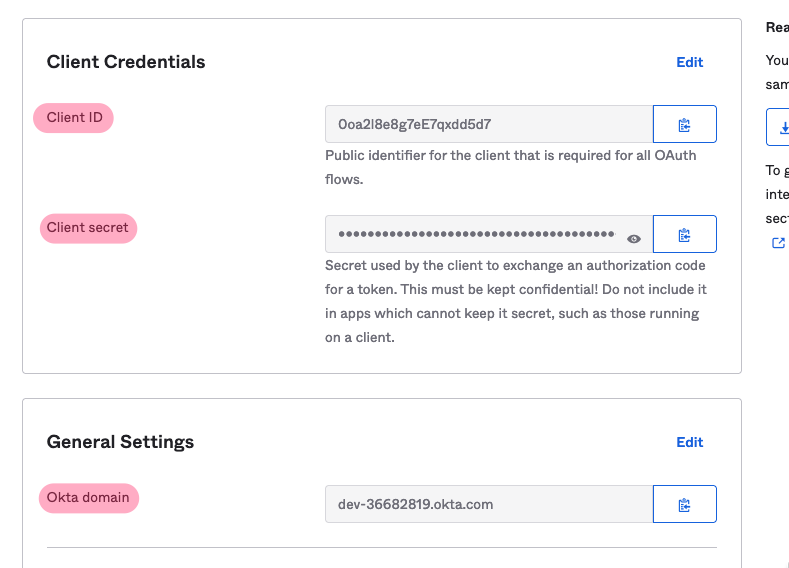
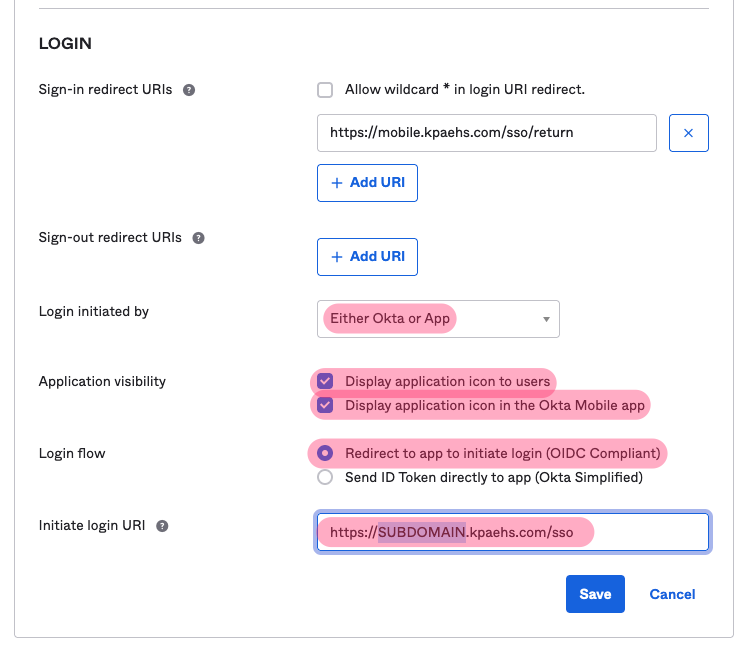
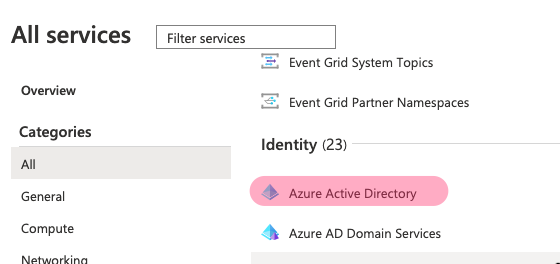
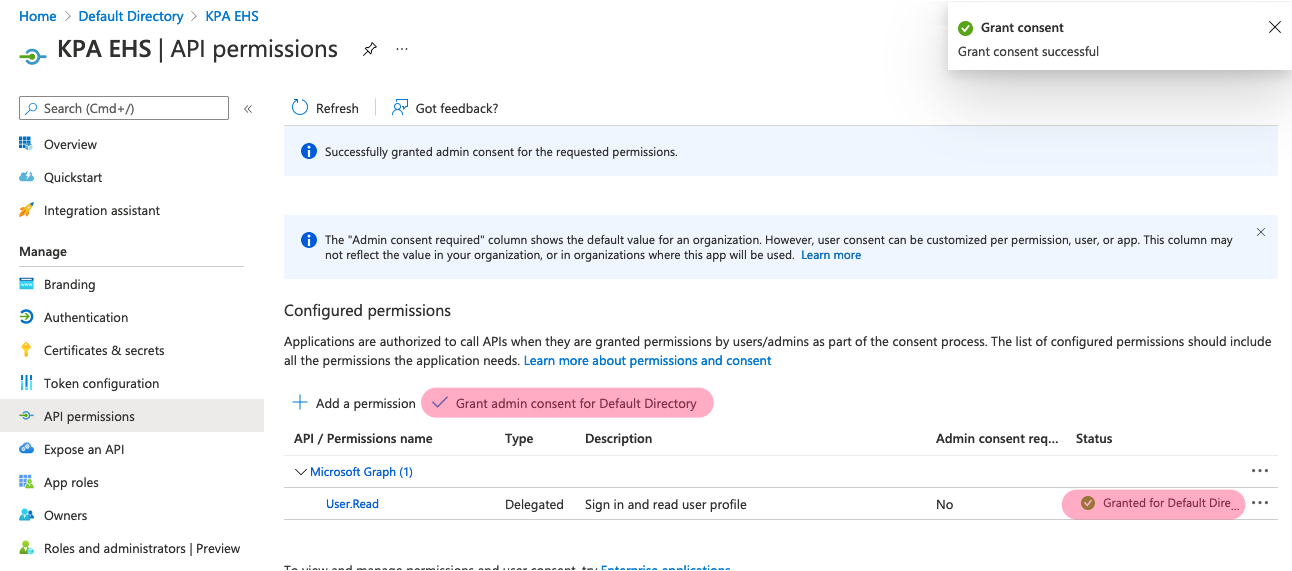
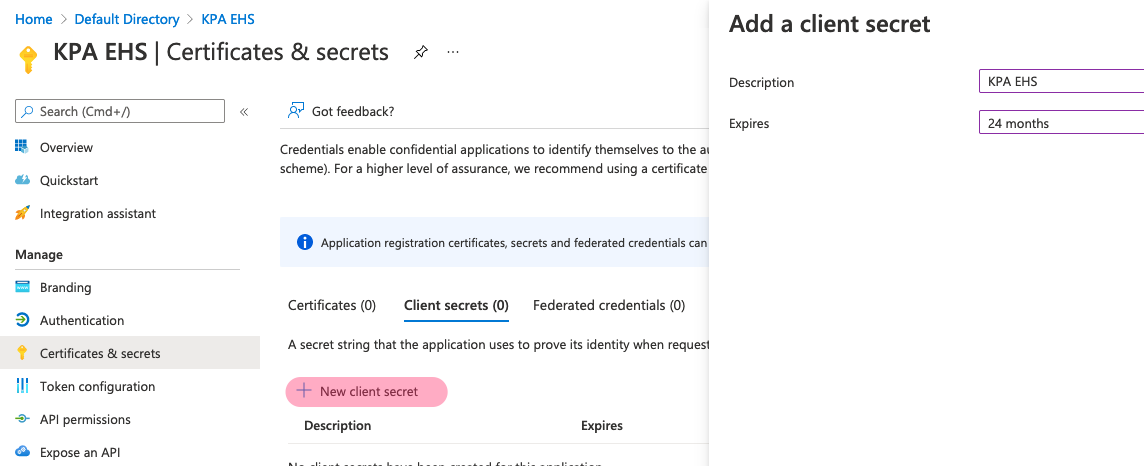
If your identity provider is Microsoft, or Google, once you’ve selected your identity provider, all you need to do is select “Save and Test this Configuration”. If you are using Okta, Azure AD, OAuth or SAML, you will need to provide additional information, as specified.
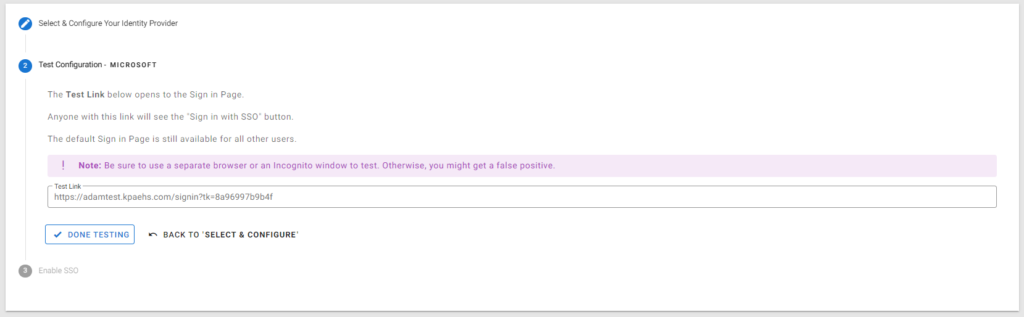
2. Once you’ve saved your information in section 1, you will need to test the configuration. Follow the instructions and use the test link that was generated for you. When finished, select “Done testing”.
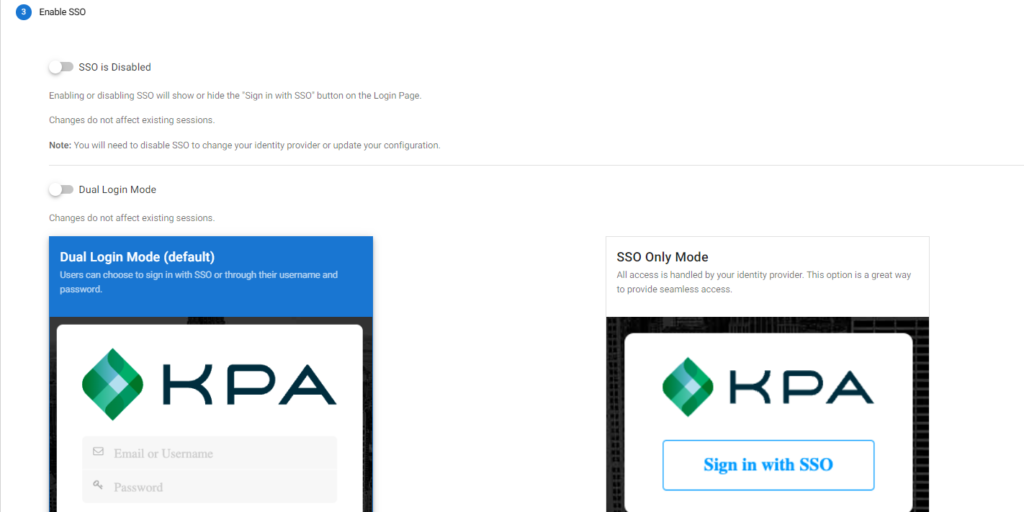
3. Lastly, remember to enable the SSO connection, and choose whether you want your users to have the option to authenticate with a username and password, or whether you want them to only be able to authenticate via SSO. Your selections on this page are saved automatically.
Please watch the video below for a summary of everything and reach out to our Support team, [email protected], for any additional assistance. Thank you!
To view the status of completed or in-progress workflows you will access the Workflow Report. Here you can view where the workflow is in the process, initiate follow-ups, print reports and more.
View a completed or in-progress workflow
Navigate to CONTROL PANEL > FORMS > WORKFLOW REPORT
Use the page filters to find a specific workflow. You can filter by the following data:
Workflow Name
Original Form that initiated the workflow
When the form was last updated
Workflow Status – Completed, Stopped, Overdue, Open
Workflows that have open Follow Up’s
Workflows that have open requests
Original Observer
Current Responsible Party
Select Columns – Before searching for your workflow you can choose the columns of data that you would like displayed by clicking SELECT COLUMNS.
Transcript List – Clicking SEARCH will display a grid of workflows that match the search criteria. Here you can click to VIEW or DELETE a workflow that is in progress or complete.
This guide walks through linking to a KPA EHS form from another app or website and pre-setting values on the form when the link is clicked.
Linking to a KPA EHS Form
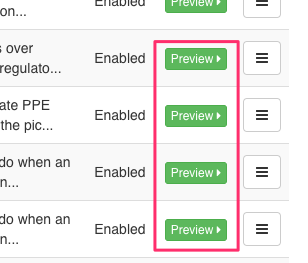
You can link to a KPA EHS form by right-clicking the “Fill Out” button and choosing “Copy Link Address”:
https://acme.kpaehs.com/forms/responses/new/6512
In some cases, you may prefer to link to a form within the native iOS and Android apps. In that case, use the same form id to create a short link:
kpaehs://forms/6512
When this link is clicked from another app it will open the KPA EHS app and then open the identified form within the offline forms module.
Pre-filling Fields
Now that you’ve linked to your form, you may want to pre-fill some of the fields. For example, maybe there’s a text field that should be pre-filled to “Hello World”.
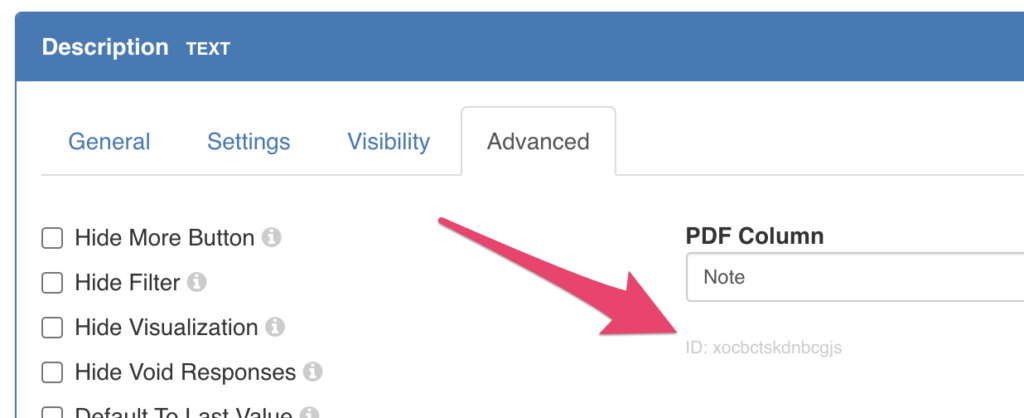
First you’d need to know the field id. Open the field settings and click advanced:
To handle the encoding, we’ll use JavaScript to create a URL that sets this Description field to “Hello World”:
This also works on the web link we showed at the very beginning. You can pre-fill as many fields as you’d like – just keep in mind that some older browsers (like IE11) are limited to 2k characters – so probably 30 fields.
You can do the same for other field types like Select fields. The easiest thing to do is fill out a sample response then mimic what the data looks like.
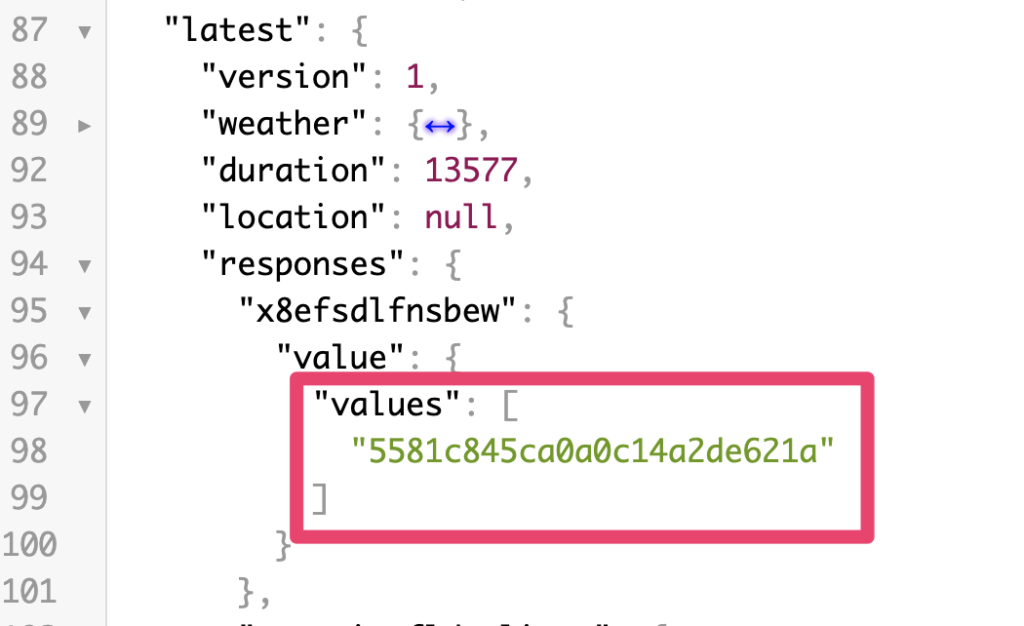
For example, if you view a response then the url looks like https://acme.kpaehs.com/forms/responses/view/14272862. Change the word “view” to “json” in the url and you can see the raw data. Now under “latest” find your fieldId (in this case it’s x8efsdlfnsbew). The “value” object is what you’ll want to mimic.
So pre-filling both the text field and our new select field would look like this:
NOTE: To edit Scheduled Tasks, you must have the Scheduled Tasks permissions granted to you.
OVERVIEW
The Scheduled Tasks feature in iScout allows you to create and schedule tasks for groups of employees, an individual employee, or yourself, to complete an assignment through an Open Task, and track the completion performance of those tasks.
CREATING A NEW SCHEDULED TASK
To access this feature, navigate to the Control Panel > Scheduled Tasks
Here, you will be able to create a new Scheduled Task for a group of employees and see all completion details and history of those tasks.
To create a new task:
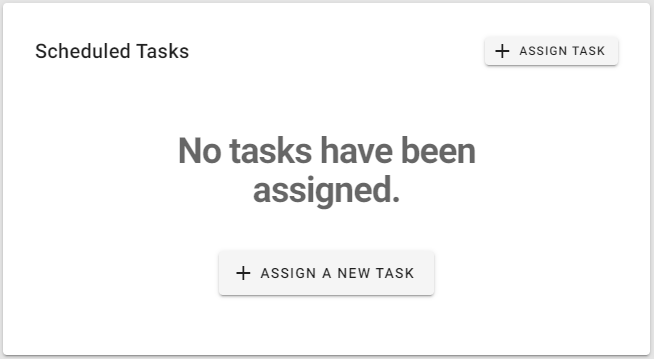
Click +ASSIGN TASK or +ASSIGN A NEW TASK
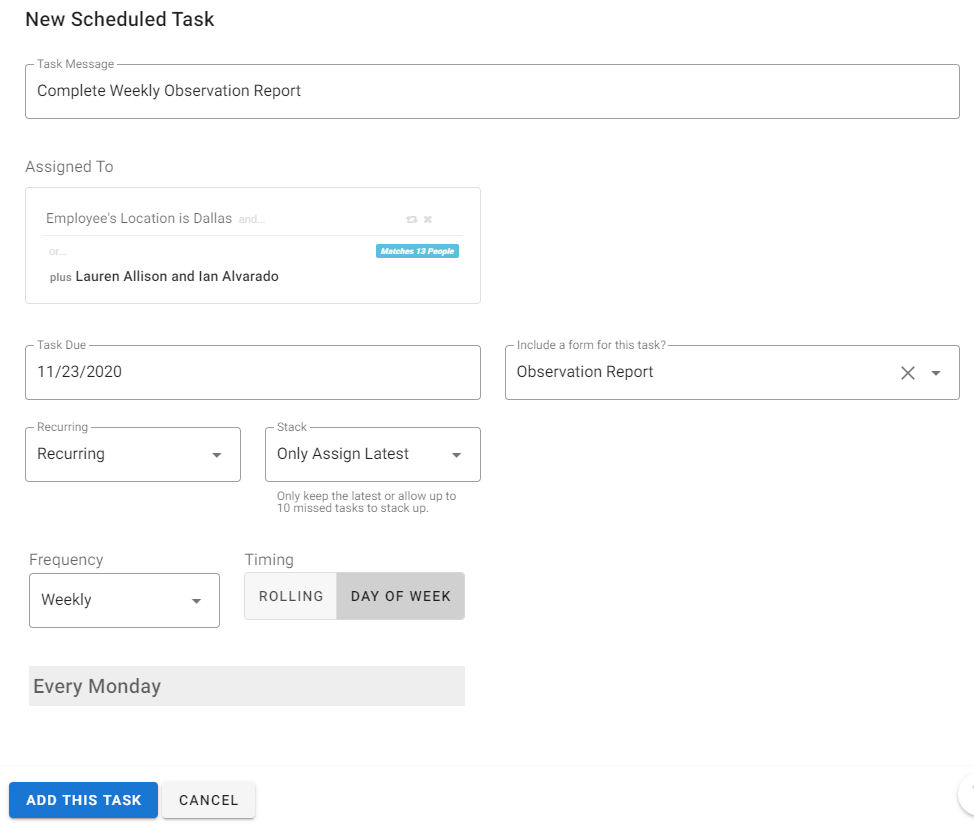
Type in your Task Message, this will be what the employee sees in the Open Task, like “Complete Weekly Observation Report”
Assign the task to employees based on conditions (without updating any conditions, this task will be assigned to ALL employees)
You can also assign the task to individual employees
The Task Due feature allows you to create a due date for the task
Clicking the Include a form for this task? will allow you to tie a Form to this task
When an employee views the Open Task, they will be taken directly to the selected Form to fill out and submit
The Recurring option allows you to set this Task as a one-time occurrence, or create a recurring schedule
Frequency allows you to select how often the task should happen and is scheduled according to the Task Due date setting
Timing sets the task schedule based on Rolling or a specific Day of the Week
Stack gives the option to Only Assign Latest (remove any previously missed Open Tasks in favor of the most current assignment) or Stack (to keep up to 10 missed tasks open, allowing the employee to catch up)
Once all settings are complete, click ADD THIS TASK to save
In the example below, the New Scheduled Task called Complete Weekly Observation Report:
Is assigned to all employees in the Dallas office, plus 2 additional employees
Will begin on Monday, 11/23/2020
Includes the Observation Report form
Is scheduled every week, on Mondays
And will only assign the latest occurrence (you will be able to see any missed tasks on the dashboard)
SCHEDULING A TASK FOR YOURSELF
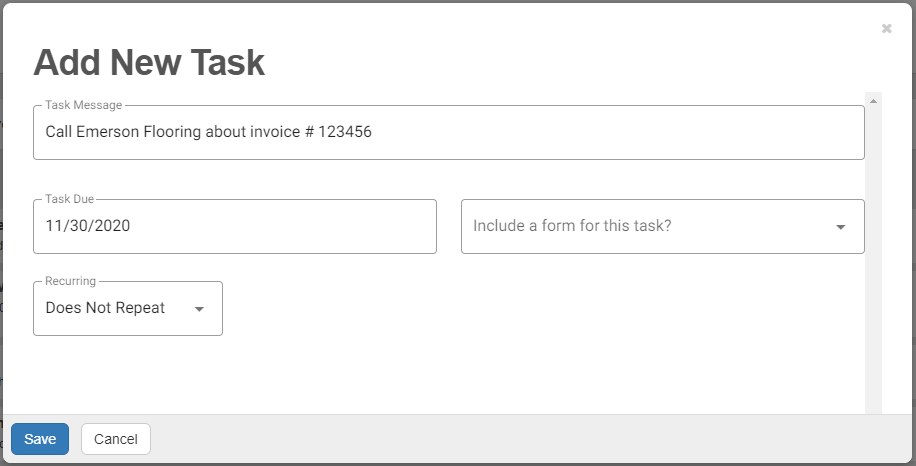
With the proper permissions, you can schedule a task for yourself, like a reminder to call a vendor about an invoice.
From the Home page of the iScout website, click the button next to your Open Tasks
Here, you have the same options to set the due date, include a form, and create a recurring task
SCHEDULING A TASK FOR ANOTHER EMPLOYEE
With the proper permissions, you can schedule a one-off task for another employee, like assigning a Job Safety Analysis (JSA).
Search for and view another employee profile
Click the button in the top right corner of the profile
Here, you have the same options to set the due date, include a form, and create a recurring task
REVIEWING SCHEDULED TASKS
Once a task has been scheduled, either for the entire company, yourself, or as a one-off for another employee, you can review the performance of those tasks in the dashboard.
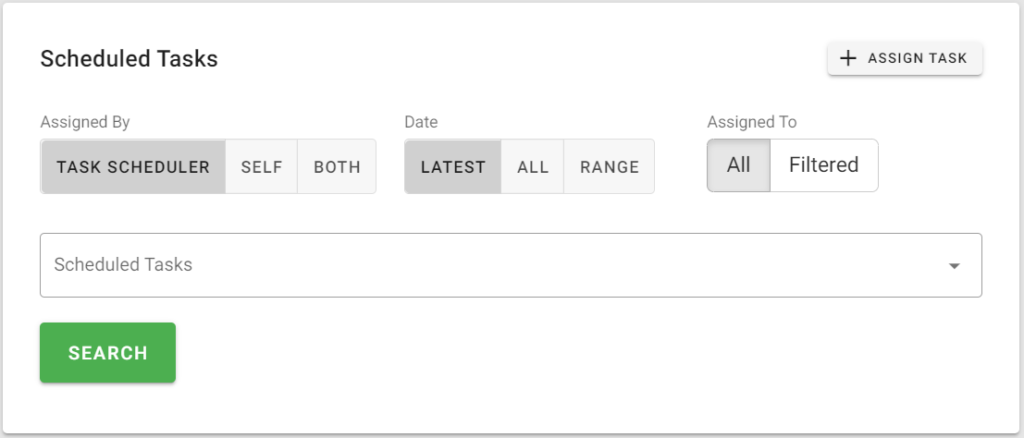
Begin by searching for the tasks you want to review.
Assigned By
TASK SCHEDULER means a task that was scheduled for other employees, either as a large group or as an individual one-off
SELF refers only to tasks scheduled for individuals
BOTH will incorporate all scheduled tasks
Date
LATEST will pull results from the most recent version of the task
ALL will display all results
RANGE allows you to view results from a specific date range
Assigned To
ALL will display all results
FILTERED allows you to filter employees based on conditions within the employee profile
The Scheduled Tasks drop down allows you to select a specific task. If none are selected, ALL tasks will be visible.
Below, you will see a dashboard displaying performance results for the Scheduled Tasks that were searched.
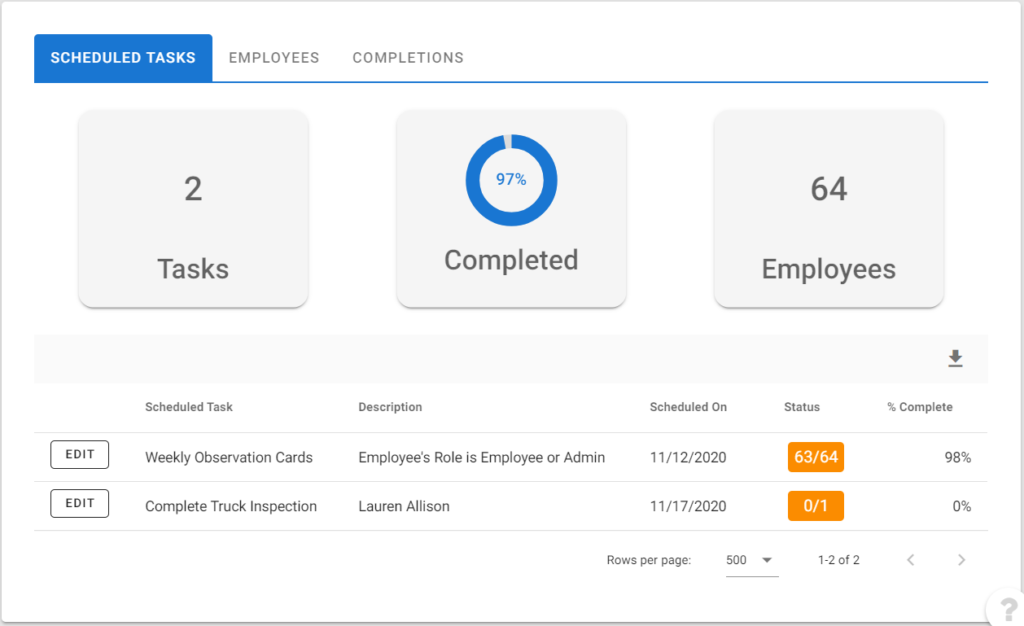
The Scheduled Tasks tab will display the overall performance, along with a list of the individual tasks, a description of who the task is assigned to, the most recent schedule, the status, and the completion percentage. This data can be downloaded in an Excel spreadsheet or a PDF by clicking the appropriate icon.
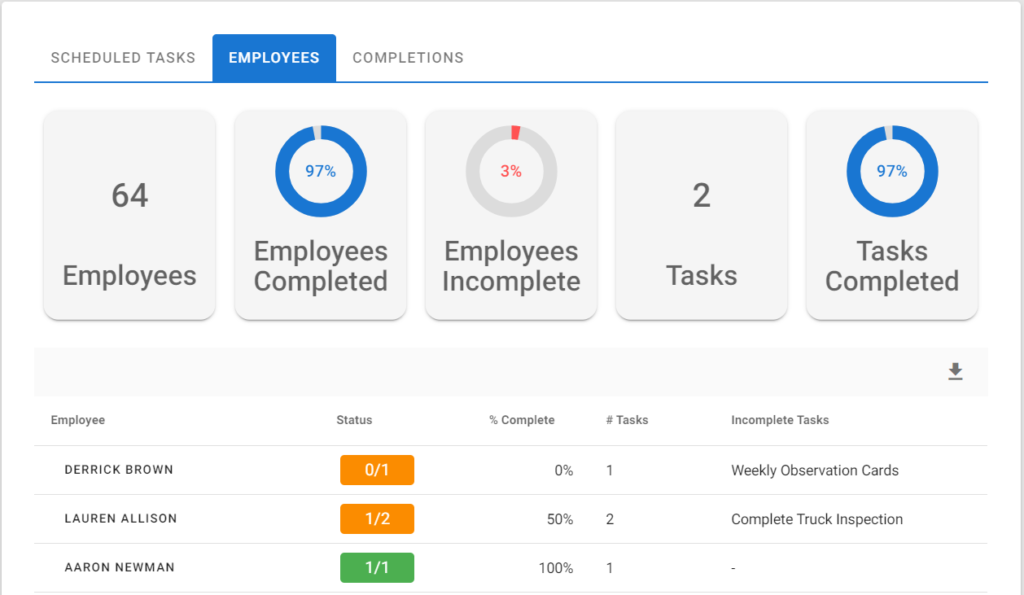
The Employees tab will display performance by employee, listing all employees with a scheduled task, their individual status, completion percentage, total number of assigned tasks, and the names of any incomplete tasks. This data can be downloaded in either an Excel spreadsheet or a PDF by clicking the appropriate icon.
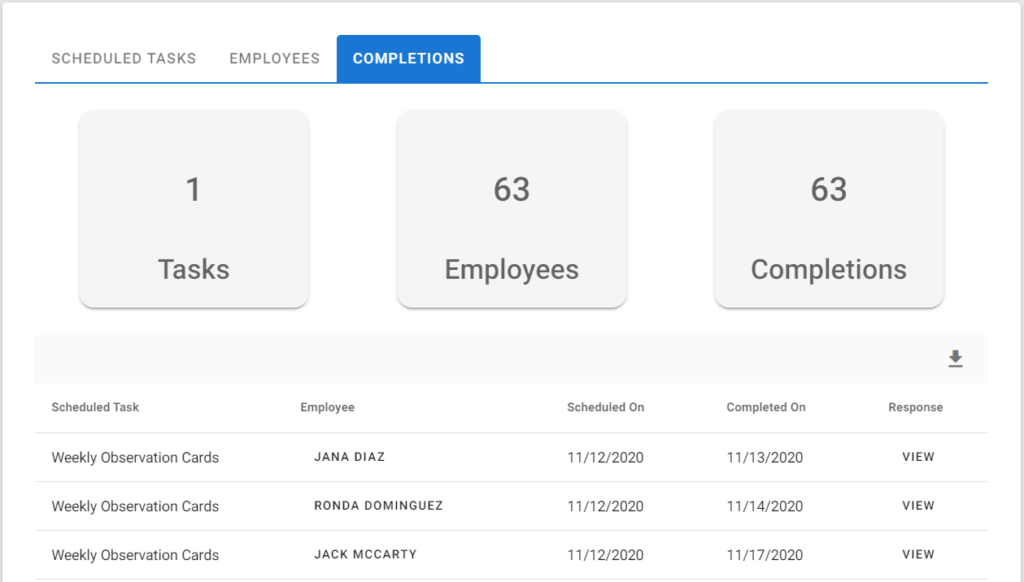
The Completions tab allows you to view all task completions, along with a Form Response, if a Form was attached to the task. This data can be downloaded in an Excel spreadsheet or a PDF by clicking the appropriate icon.
This data can also be shared using the Rules engine, click here for more information.
EDITING OR DELETING SCHEDULED TASKS
If you need to make any changes to an existing Scheduled Task, search for the tasks as described above, then click the EDIT box next to the desired task.
The switch allows you to deactivate a previously scheduled task, while still being able to view its past performance. This will cancel any current Open Tasks for employees and turn off future recurrences.
Once any changes are made to the task, click the UPDATE THIS TASK to save those changes.
Clicking the CANCEL button will cancel any changes to the task and return you to the dashboard.
If you would like to delete the task altogether, click DELETE. This will also delete all performance history for this task.
Excel loves to reformat your data when you open a file. Unfortunately, that means it might remove “leading” zeros when you open a spreadsheet.
For example, your employee numbers may start with a few zeros, “0001024”. Excel (trying to be helpful) removes those zeros and now you see “1024”. That’s a bummer if your extra zeros are important.
Fortunately there’s a way to open the spreadsheet without any automatic formatting. Check it out:


