Assigning Training (Video)
Overview
“Window” schedule trainings allow you to setup a window of time each year that a training is completed. This is for annual trainings only. Employees are considered up-to-date if they completed it last time the training was offered.
For example, I want everyone to complete “Ladder Safety” in June each year, regardless of when they previously completed it.
New Employees
A “New Employee” is someone who was hired after the training was last offered. If the profile has no hire date, the profile creation date is used. If no hire date is set, the profile’s creation date is used.
For new employees, you may want them to complete the training immediately to “catch up” with the group. Or maybe you want them to wait until the window opens like everyone else.
The “Required for New Employees” switch determines whether it’s required for them. If they are not required, their status will be “Other” until the training window opens (and they will not receive a task until the window opens).
Last Offered Date
Any completion after the “Last Offered Date” will be considered “up-to-date”. If no “Last Offered Date” is listed then all completions are considered valid.
If a training has never been offered, then it will only show an employee as “expired” if “Required for New Employees” is checked.
Tasks
Task are visible any time an employee is either expiring or expired.
Example Scenarios
Here are some example scenarios that may help explain various situations.
| Description | Status | Task |
| Completed it today | Up-to-date | – |
| Completed it last time, in the window | Expiring | Y |
| Completed it last time, outside the window | Up-to-date | – |
| Never completed, new are required | Expired | Y |
| New employee, new aren’t required, in the window | Expiring | Y |
| New employee, new aren’t required, outside the window | Other | – |
| Old employee, never completed, new aren’t required, has been offered | Expired | Y |
| Old employee, never completed, new aren’t required, never been offered, in the window | Expiring | Y |
| Old employee, never completed, new aren’t required, never been offered, outside the window | Other | Y |
Forms More Button (Video)
Restoring Deleted Records (Video)
Group Trainings (Video)
Welcome Emails (Video)
One-Off Trainings (Video)
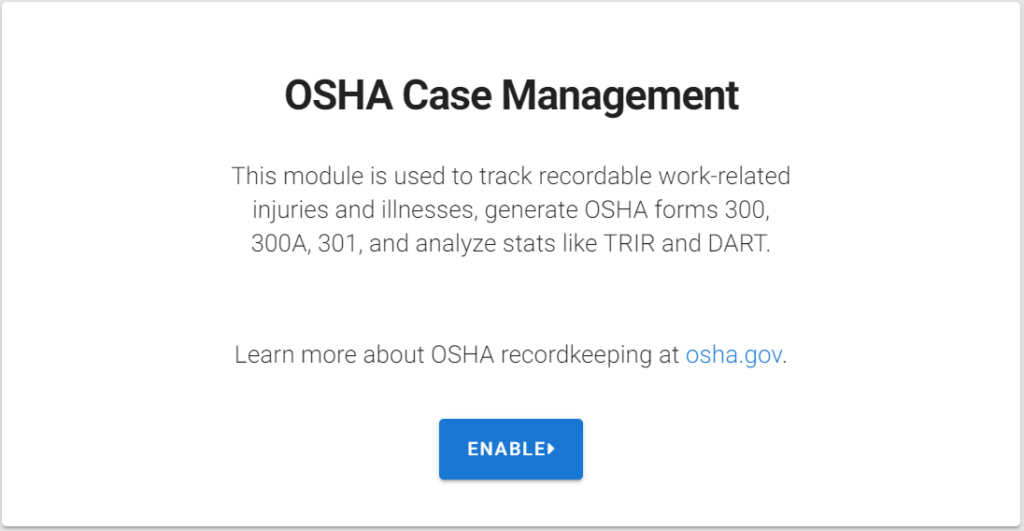
OSHA Case Management (Video)

OSHA CASE MANAGEMENT
The OSHA Case Management module is used to track recordable work-related injuries and illnesses, generate OSHA forms 300, 300A, 301, and to analyze stats like TRIR and DART.
To learn more about OHSA recordkeeping, click here.
SETTING UP CASE MANAGEMENT
NOTE: To edit and access this module, you must have the OSHA Case Management permission granted to you.

Navigate to Control Panel > OSHA Case Management
Here, you will see a message to Enable the module and get started.
Once you click Enable, the site will walk you through the steps of adding data to your module.
CREATING ESTABLISHMENTS
An OSHA establishment is a single physical location where business is conducted or where services or industrial operations are performed. Learn more about OSHA’s definition of Establishments here.
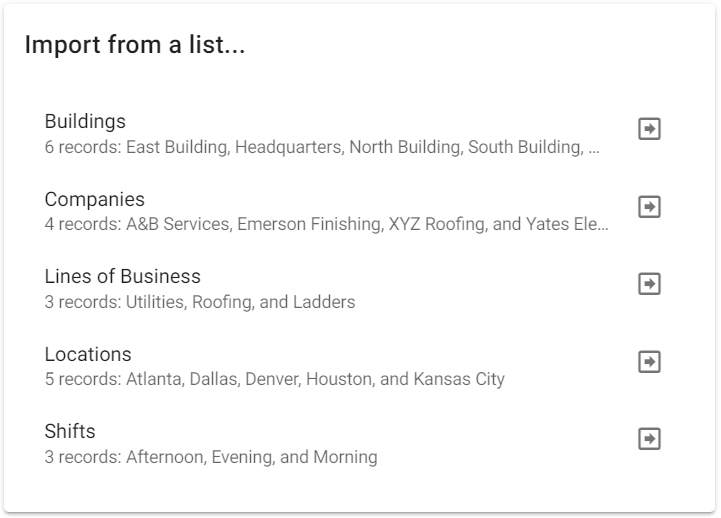
You can create Establishments 2 different ways, from a List or Manually.
Import from a list…
This allows you to import from pre-existing lists in your iScout account, like Companies, Lines of Business, Locations, or other Datalists.
Create Manually…
You can create new Establishments manually by entering all required information.
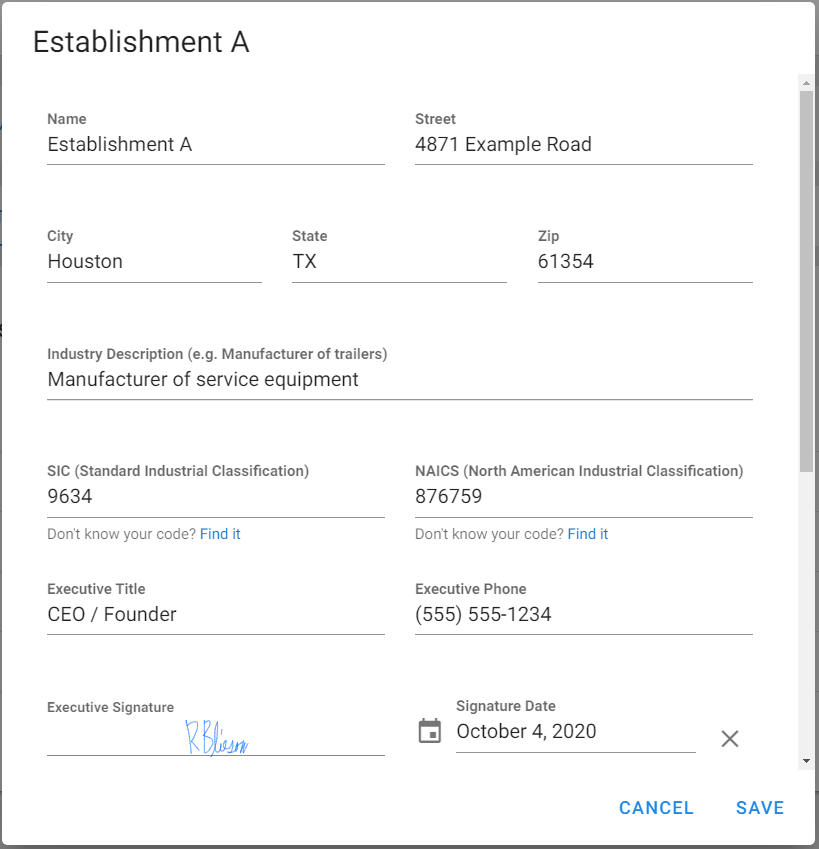
Whether you create an Establishment from a List or Manually, there are certain pieces of information that are required.
- Establishment Name and Street Address
- Industry Description
- SIC (Standard Industrial Classification)
- Click the Find It link to search the OSHA site
- NAICS (North American Industrial Classification)
- Click the Find It link to search the NAICS site
- Executive Title and Executive Phone
- Executive Signature and Date
- Average # of Employees working in that Establishment per Year
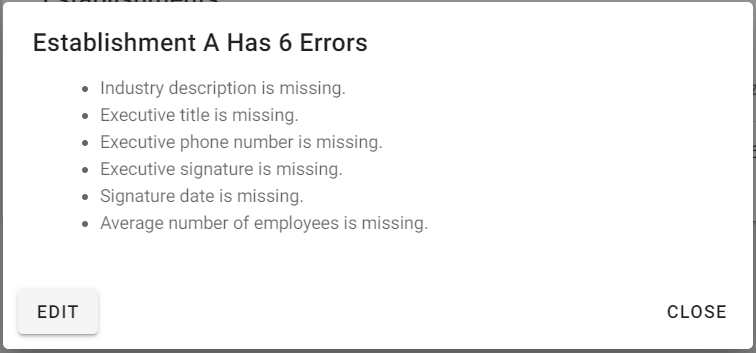
If any of this information is missing, an error message will appear, listing the missing data and giving the option to make edits.
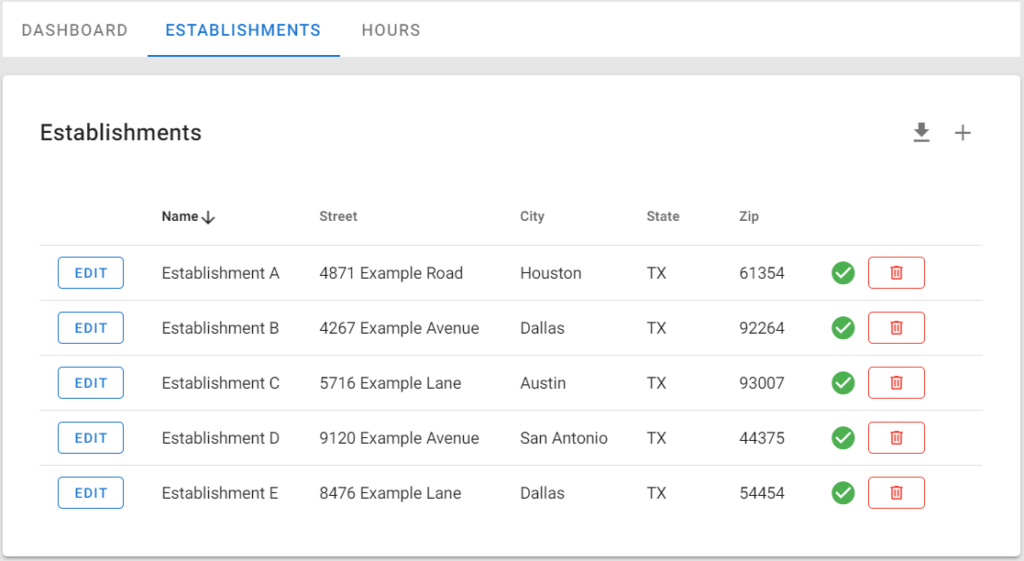
Once all Establishments are entered, you’ll see them listed here. They can be Edited, Deleted, downloaded into an Excel file, and new Establishments added. This will also indicate that all required fields are complete with the green check mark.
ADDING EMPLOYEE HOURS
In order for iScout to calculate safety related metrics of TRIR (Total Recordable Incident Rate) and DART (Days Away, Restricted or Transferred), Employee Hours need to be recorded.
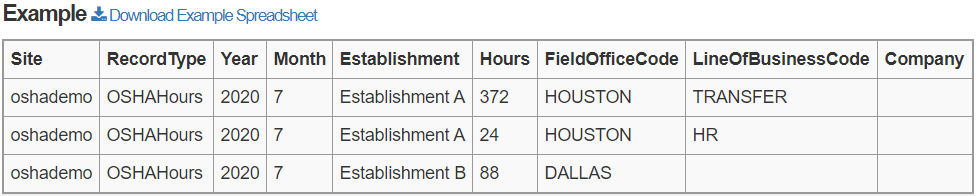
You can add Employee Hours 2 different ways, from a Spreadsheet or Manually.
To add hours using a Spreadsheet, click the link to load a bunch of hours.
To add hours Manually, click +ADD HOURS next to each month.
- Select the Establishment
- Add total Employee Hours
- Select the Field Office, Line of Business and Client (if necessary)
- Click the + button to add additional hours for the month
- Click the

button to Clone the hours to a different month
- This can be useful if your hours history is consistent each month
- Click the
 button to clear all hours from the month
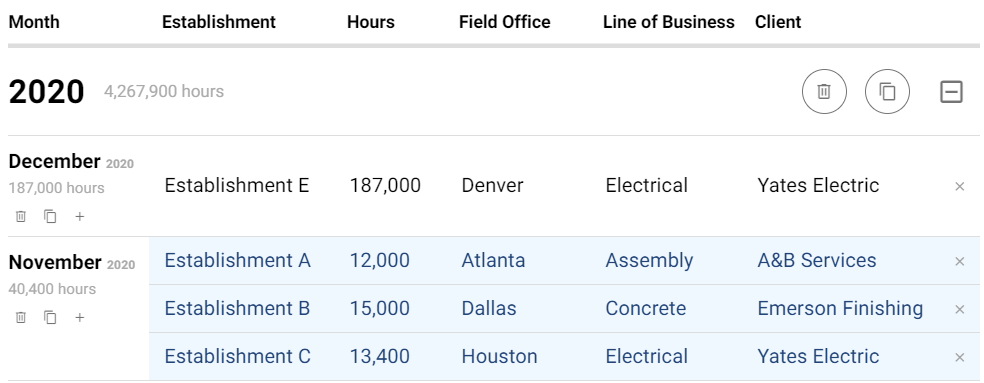
Click Save Changes to update hours. These can always be edited in the future.
DASHBOARD
Once Establishments have been created and Hours have been added, the Dashboard will give you visibility to your Incident History and Statistics.

ADDING A NEW INCIDENT CASE
To begin a new incident report, click + NEW CASE on the Dashboard page to begin filling out the OSHA Recordable Incident form.
This form will only be available to fill out within the OSHA Case Management module. The data that is collected in this form is used to calculate TRIR, DART and Severity metrics.

The form is created to capture all required information to satisfy the OSHA Form 301 report, including the Outcome of the case.
In Outcome, if Days Away From Work or Job Transfer or Restriction are selected, choose how you want to keep track of those days, Calculated or Manual.
- Calculated will allow you to create distinct periods the employee was away from work, select the date the period started, and iScout will automatically calculate Days Away in real time.
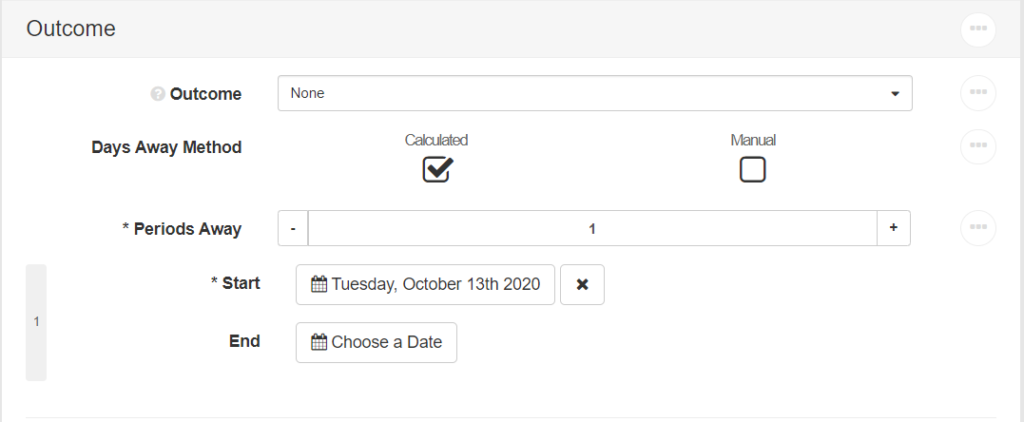
- Manual allows you to manually update the number of days the employee has been away from regular work.
Once all available information has been filled out, click Submit to enter the form and create a new case.
For more information about How to Administer the OSHA Case Management module, click here.
